Download
1 / 52
530 likes | 907 Views
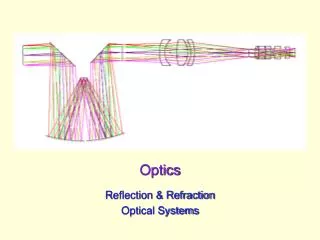
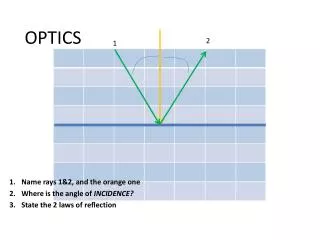
Optics. A Greatly Simplified Overview. At a distance of 20 feet, light rays become parallel. Placing a lens in the path of the light results in bending of all but 1 light ray.

E N D
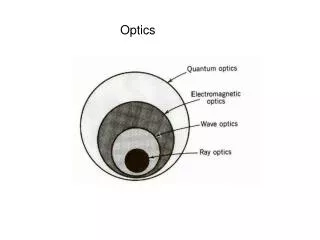
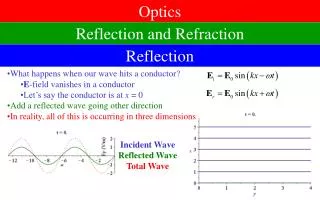
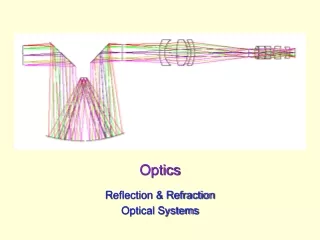
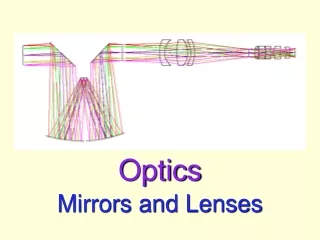
Optics A Greatly Simplified Overview
At a distance of 20 feet, light rays become parallel. Placing a lens in the path of the light results in bending of all but 1 light ray.
This single light rays is called the optical axis ray; it passes straight through the center. All of the other rays will bend. • + (convex) lenses will cause light rays to converge. • - (concave) lenses will cause light rays to diverge.
The amount of bending that is done by the lens = diopter value. • Bigger lens = more bending. • Smaller lens = less bending.
PLUS LENSES (converging) • Rays come together at a focal point behind the lens. • The thicker lenses, the closer the focal point will come to touching the back of the lens (See Optics Example 1).
The distance between the back of the convex lens and the focal point is called the focal distance. This is measured in centimeters and can be divided into 100 to determine the bending power of the lens (diopter value).
MINUS LENSES (diverging) • The rays will bend away from the optical axis ray after they have passed through the lens, the focal point is in front of the lens and is the place where the diverging rays “appear” to originate from.
The thicker the lens, the closer the focal point will be to the front side of the lens (See Optics Example 2).
The distance between the front of the lens and the focal point is called the focal distance. This is measured in centimeters and can be divided into 100 to determine the bending power of the lens (diopter value).
Formula for Focal Distance • 100/diopters = focal distance in cm
Refractions • Normal eyes = 60 diopters of refractive power (emmetropic). • If eye has less than 60 (short eye), it is farsighted or hyperopic. Can make up for difference in power with + lenses.
If eye has more than 60 (long eye), it is near sighted or myopic. Can reduce power with – lenses
Myopia • May bring the object being viewed into focus by bringing it closer to the eye. This is why people with the refractive error of simple myopia (no astigmatism) may read better at close distances without glasses. They have “built in” magnifiers.
When viewing at distance, person with uncorrected myopia may squint. This is done in an effort to create a pinhole.
Hyperopic • If young, accommodation may allow for a change in the shape of the eyeball. This will result in person with uncorrected refractive error being able to read without glasses at near distances. This is VERY fatiguing.
Magnification simply makes a bigger image on the retina and gives the person more information to work with. Magnification assumes that at least part of the retina is viable.
4 Types of Magnification • Relative distance magnification…bring what you are looking at closer, hold something ½ as far away…the size of the image on the retina doubles. • Relative size magnification…makes what you are looking at bigger.
Angular magnification…use of lenses. • Projection magnification…project an image onto a screen.
May combine the different types of magnification to get even greater levels of magnification. • Keep in mind the bigger something is, the less of it you can see at one time.
DANGER, DANGER WILL ROBINSON • When working with magnification, it is very important to keep diopters and powers (or X’s) separate. • There is a 4:1 difference between diopters and powers. So…a 24D lens = 6X. The formula is F/4 (high-add reading glasses. Be advised that some magnifiers may be different. (F/4 +1) (handheld magnifiers).
Don’t always believe the manufacturers power labels on magnifiers (often they are wrong or misleading). Use the diopters to get a more accurate picture. • In low vision, the standard to label magnifiers is based on a working distance of 25cm.
LOW VISION DEVICES • Include: • Telescopes. • Telemicroscopes. • Microscopes (reading lenses, loupes, clip-on’s). • Magnifiers (stand, handheld).
Projection (electronic magnifiers). • Field enhancement devices (prisms, reverse telescopes, mirrors). • Non-optical aids (filters, bold pens, bold line paper, etc.).
Computing Magnification • Distance work in feet person has 20/200 person needs 20/40 will require 5X magnification
Near work in meters person has 0.4/1.0 person needs 0.4/0.5 will require 2X magnification But…alas, it’s not that simple.
Hints for Near Vision ~The standard for near is 40cm (just like the standard for distance is 20 feet). ~Distance the student used/X = 40cm/# of the smallest line read on the near card.
Hints for Near Vision (cont.) ~Remember though…you need to keep the numbers on the right hand side all in the same value. In other words, if you are working in meters for print size, your distance measurements need to also be in meters. So, we must divide the 40 by 100 to get 0.4.
Hints for Near Vision (cont.) ~Then you set up the ratio. For this example we are saying the student read 1.0M and he wants to read 0.5M. ~The fractions should read: 0.4/1.0 = 2 …so,heneedsa 2X(8 0.4/0.5 diopters) magnifier to read 0.5M print. ~Keep in mind, you can use whatever distance the student needs.
Hints for Near Vision (cont.) ~Suppose your student read 2.4M at 15cm…and he needs to be able to read 1.0M at 15 cm. How much magnification should you give him? -.15/2.4 is what currently reading. -.15/1.0 is what he needs to read. -It is a difference of 2.4 so a 2.5X (10 diopters) magnifier should work.
Equivalent Powers/Distance • Whenmagnifiersareused inconjunction with bifocal adds, or at distances that are closerthaninfinity,the focal distance and total power of the combined lens systems require additional computation. Feq = F1+F2-cF1F2 F1 = spectacle; F2 = magnifier; c = the distance between the two in meters. (meters, meters, meters.)
Formula Feq = F1+F2-cF1F2 Feq = equivalent lens power F1 = magnifier F2 = spectacle add c = the distance between the two in meters.
Tricky Part. Knowing the glasses are the correct Rx. • And this is what you might not know: ~The glasses Rx is no longer correct. Providing magnification at this time is only magnifying “blur”. ~Sometimes only partial correction may be given. This may be done in an effort to maintain a better working distance or to allow the person an opportunity to adapt to new Rx.
Tricky Part (cont.) ~You need to know this… (Lensometer vs. Refraction!) (What does the student need vs. what does student have in current glasses.). ~Partial corrections, the use of an add and viewing distance will influence the focal distance of magnifiers.
~Relative distance magnification in conjunction with reading add or other angular magnification will change total magnification yield and focal distance. ~Some of the power of the magnifier may be “eaten up” to make up for refractive error. Tricky Part (cont.)
Working w/ the Formula • A student has a reading add of +3.00D, and uses a +7.00D magnifier. What is the equivalent power of the system? ~If the student hold the magnifier up to the spectacle add: Feq = F1+F2-c(F1F2).
Working w/ the Formula (cont.) • Answer: #1 sample. Feq = +3.00 + 7.00 – 0(3x7) = +10.00D. You essentially combined the powers of the add with the magnifier.
Working w/ the Formula (cont.) • Your student doesn’t want to hold the magifier that close…so he moves it 14cm away to use it. What happens to the power?
Working w/ the Formula (cont.) • Answer: #2 sample. Feq = +3.00 + 7.00 – .14(3x7). Feq = 10.00 - .14(21). Feq = 10.00– 3(actual 2.94)=+7.00D. Reminding you to change 14cm to .14M before multiplying.
Working w/ the Formula (cont.) • Somebody asked the student about using the magnifier. Now he is a little uncomfortable with it. He chooses to move the magnifier 13 inches away (33cm) so the other kids won’t see him using it from across the room. What happens to the power of the magnifier now?
Working w/ the Formula (cont.) • Answer: #3 sample. First thing to do is change 13 inches to cm (1 inch = 2.5cm). • Feq = F1+F2-c(F1F2). • Feq = (3.00 + 7.00) - .33(3x7). • Feq = (3.00 + 7.00) - .33 (21). • Feq = 10.00 – 7 (actual 6.93) = +3.00D.
It’s All About Placement • 58 diopter eye: Add +5 diopter lens. 2 diopters used up to bring eye to 60 so there is only a +3 gain in power. Total power +3 Focal distance (100/3) = 33cm.
It’s All About Placement (cont.) • 60 diopter eye Add +10 magnifier. Total power = +10. Focal distance (100/10) = 10cm.
It’s All About Placement (cont.) • Using +3 add in bifocal and +10 magnifier (with magnifier touching the bifocal) Feq =10 + 3 = 13.00D. Total power +13 Focal distance (100/13) = 7+cm approximately.
It’s All About Placement (cont.) • Using +3 add in bifocal and +10 magnifier (with magnifier 5cm from the bifocal) Feq = 10 +3 -0.5(10X3) = +11.50D. Total power +11.50 Focal distance (100/11.50) = 8+ cm approximately.
But… • Some practitioners suggest there is still more to this process…they recommend we also consider: • Acuity reserve: This implies that magnifier users are not able to continually work at their threshold acuity and will need to keep some “in the bank” to sustain the task for longer periods.
But… (cont.) • Contrast reserve: This brings to mind the need to measure contrast sensitivity and also allow for some contrast “stockpile” when planning for requirements related to near vision usage.
But… (cont.) • Now remember: You can’t expect your student to use up all of his/her visual capacities…and be able to sustain a task. So, in other words, if it is a struggle to read one phone number… reading a page of phone numbers would be unreasonable.
But… (cont.) • Field of view: Consider the number of letters the reader is able to take in at one time. (The more magnification given, the lower the number of letters will be).