Download
1 / 18
180 likes | 369 Views
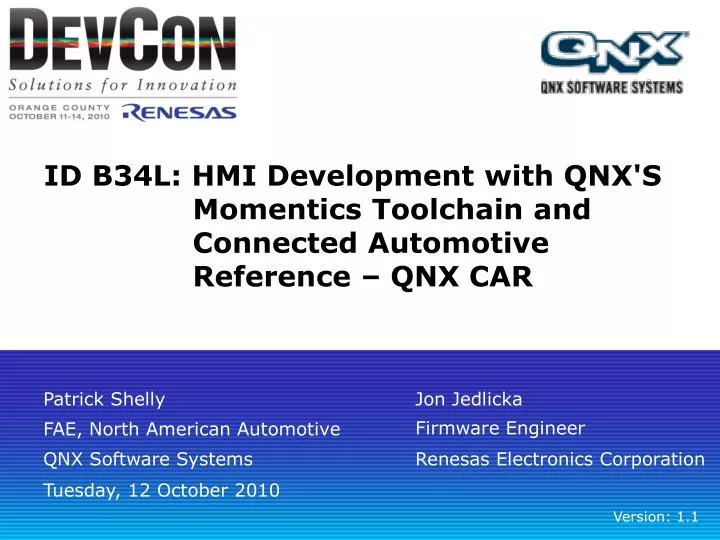
ID B34L: HMI Development with QNX'S Momentics Toolchain and Connected Automotive Reference – QNX CAR. Patrick Shelly. Jon Jedlicka. Firmware Engineer. FAE, North American Automotive. QNX Software Systems. Renesas Electronics Corporation. Tuesday, 12 October 2010. Version: 1.1.

E N D
ID B34L: HMI Development with QNX'S Momentics Toolchain and Connected Automotive Reference – QNX CAR Patrick Shelly Jon Jedlicka Firmware Engineer FAE, North American Automotive QNX Software Systems Renesas Electronics Corporation Tuesday, 12 October 2010 Version: 1.1
Renesas Technology and Solution Portfolio Microcontrollers& Microprocessors#1 Market shareworldwide * SolutionsforInnovation Analog andPower Devices#1 Market sharein low-voltageMOSFET** ASIC, ASSP& MemoryAdvanced and proven technologies * MCU: 31% revenue basis from Gartner "Semiconductor Applications Worldwide Annual Market Share: Database" 25 March 2010 ** Power MOSFET: 17.1% on unit basis from Marketing Eye 2009 (17.1% on unit basis).
Renesas Technology and Solution Portfolio Microcontrollers& Microprocessors#1 Market shareworldwide * SolutionsforInnovation Analog andPower Devices#1 Market sharein low-voltageMOSFET** ASIC, ASSP& MemoryAdvanced and proven technologies * MCU: 31% revenue basis from Gartner "Semiconductor Applications Worldwide Annual Market Share: Database" 25 March 2010 ** Power MOSFET: 17.1% on unit basis from Marketing Eye 2009 (17.1% on unit basis). 3
Microcontroller and Microprocessor Line-up • Up to 1200 DMIPS, 45, 65 & 90nm process • Video and audio processing on Linux • Server, Industrial & Automotive Superscalar, MMU, Multimedia • Up to 500 DMIPS, 150 & 90nm process • 600uA/MHz, 1.5 uA standby • Medical, Automotive & Industrial High Performance CPU, Low Power • Up to 165 DMIPS, 90nm process • 500uA/MHz, 2.5 uA standby • Ethernet, CAN, USB, Motor Control, TFT Display High Performance CPU, FPU, DSC • Legacy Cores • Next-generation migration to RX R32C H8S H8SX M16C General Purpose Ultra Low Power Embedded Security • Up to 25 DMIPS, 150nm process • 190 uA/MHz, 0.3uA standby • Application-specific integration • Up to 10 DMIPS, 130nm process • 350 uA/MHz, 1uA standby • Capacitive touch • Up to 25 DMIPS, 180, 90nm process • 1mA/MHz, 100uA standby • Crypto engine, Hardware security 4
Microcontroller and Microprocessor Line-up • Up to 1200 DMIPS, 45, 65 & 90nm process • Video and audio processing on Linux • Server, Industrial & Automotive Superscalar, MMU, Multimedia • Up to 500 DMIPS, 150 & 90nm process • 600uA/MHz, 1.5 uA standby • Medical, Automotive & Industrial High Performance CPU, Low Power SuperH • Up to 165 DMIPS, 90nm process • 500uA/MHz, 2.5 uA standby • Ethernet, CAN, USB, Motor Control, TFT Display High Performance CPU, FPU, DSC • Legacy Cores • Next-generation migration to RX R32C H8S H8SX M16C General Purpose Ultra Low Power Embedded Security • Up to 25 DMIPS, 150nm process • 190 uA/MHz, 0.3uA standby • Application-specific integration • Up to 10 DMIPS, 130nm process • 350 uA/MHz, 1uA standby • Capacitive touch • Up to 25 DMIPS, 180, 90nm process • 1mA/MHz, 100uA standby • Crypto engine, Hardware security 5
Introduction to Lab 1 • This lab involves starting the QNX CAR reference application, and performing development and analysis on the platform using QNX tools. • In this lab, we will • Connect to QNX CAR running on a Renesas NaviJ2 processor • Explore the capabilities of the QNX CAR reference application • Use the QNX Development and analysis tools to • Develop new application content for QNX CAR • Analyze the existing QNX CAR system
Useful Tools • QNX Momentics • SVN perspective • C/C++ and Debug perspectives • System Information perspective • Or pidin at the command prompt • System Profiling perspective • Or hogs at the command prompt • Terminal view • Target File System Navigator view • FlashDevelop • Available from www.flashdevelop.org • Adobe CS4 or CS5
Hardware Setup • Connect a USB hub to the type A port on the Amber board • Connect the network to the RJ-45 on the Amber board • Connect the Lilliput display • To the VGA connector on the Amber board • To the USB hub (touchscreen input) • Connect a serial cable to the lower D9 connector on the Amber board • Connect power to the board • Host workstation connections: • Ethernet to network • Serial to the Amber board • For details, refer to the “QNX CAR How To Guide”
Connecting to a QNX CAR Image • Boot the QNX CAR image on the NaviJ2 • Image resides on a USB stick • The USB stick is connected through a USB hub • Make sure the network is connected to a router (DHCP is used by default) • Make sure the serial cable is connected to the development host • Determine the IP address of the QNX CAR target • Open Momentics, System Information perspective • Add a terminal window, configure for COM port on development host • Set baud rate to 115200 • . /qnx-car/scripts/env.sh will set up the environment variables • At QNX prompt, enter ifconfig to find the IP address • Use this IP address to define a new Target in Momentics • This enables connection through qconn • You can then use the following perspectives: • System Information • System Profiling • Debug Gotchas: If you don’t have access to an unsecured internet connection, some of the QNX CAR functionality may not be available.
Lab 1: Connecting to QNX CAR on NaviJ2 • Prerequisites (assuming Windows host): • QNX SDP 6.4.1 • Start the NaviJ2 image using the USB stick provided • Start Momentics • Open a console connection over serial • In the System Information perspective of Momentics • Add a Terminal window • Configure to the correct COM port, and set baud to 115200 • Use ifconfig to determine the IP address • Check system status with the pidin command • Establish a network connection via qconn • Review system status using the System Information perspective • Collect a system trace, and review in the System Profiling perspective • When you are done with this part of the lab, turn your die so side 2 is up
Introduction to Lab 2 • In this lab we will build a base OS image from the SH77722 BSP. We will then add in the necessary components to support an HMI based on Adobe Flash, using the QNX Aviage HMI Suite. • In this lab, will • Import the SH77722 BSP into QNX Momentics • Add components necessary to play Adobe Flash files on the target • Test the result using an example Adobe SWF file
Adding the QNX Aviage HMI Suite • Using the System Builder perspective, add Aviage HMI Suite support to the OS image • Add binary: flash • Add DLLs: flashlite-565.so, hmip-gf.so, flashsnddec.so, flashviddec_on2.so and flashviddec_sorenson.so • Add the configuration file and vector font file for Flash Lite 3 • Copy the flash.conf and vfontdata.swf files from C:\QNX641\target\qnx6\etc\system\config to the workspace under C:\QNX641\workspace\SH77722\bsp-sh77722-amber\etc\system\config • Edit the project.bld file, and check that the new files are in the /etc/system/config directory on the target • Edit the flash.conf file, changing the value of mso-path from /tmp/flmso to /tmp, and removing the comment delimiter for the statement embedded_font_file = /etc/system/config/vfontdata.swf • In flash.conf, uncomment the dll=flashlite-565.so (others commented out) • Rebuild the OS image, use the shutdown command to reload to target • Run some basic diagnostics: Use flash -C to review the configuration • Run a test application on the target • Using the Target File System Navigator, copy the pacman.swf provided to the /tmp directory on the target • At the target command prompt, run flash /tmp/pacman.swf • Ctrl-C to terminate the program • Now try flash -h480 -w800 /tmp/pacman.swf
Lab 2: Working with the NaviJ2 BSP • Prerequisites (assuming Windows host): • QNX SDP 6.4.1 • Start Momentics, and create a new project for the BSP • Name the project SH77722 • In Momentics, use File -> Import to create the project • Build and test the base OS Image • Use the System Builder perspective • With no changes, build a default image • Download and test on the SH77722 target • Add in the Adobe Flash player and a test application • Add the following to the OS image by editing project.bld • Binaries: flash, io-display • DLLs: devg, flashlite-565.so, hmip-gf.so, flashsnddec.so, flashviddec_on2.so, flashviddec_sorenson.so • Shared Libraries: • Other files: flash.conf, display.conf, • When you are complete the the lab, turn your die so side 6 is up