Download

1 / 61
610 likes | 780 Views
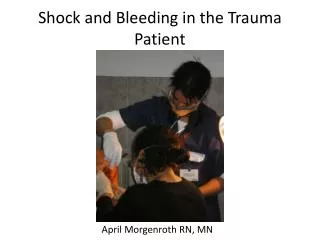
Shock and Bleeding. Shock and Bleeding. By Kevin O’Loughlin, MICP This Course Has Been Approved for 2.5 Hour of Continuing Education for: First Responders EMT-I Paramedics. Continuing Education.

E N D
Shock and Bleeding By Kevin O’Loughlin, MICP This Course Has Been Approved for 2.5 Hour of Continuing Education for: First Responders EMT-I Paramedics
Continuing Education • To receive continuing education for this course you must complete the post test and evaluation available on the EMS Agency website San Joaquin County EMS- Training / Continuing Education. • Submit the completed test and evaluation to the EMS Agency and a CE certificate will be mailed to you. • There is no charge for this course.
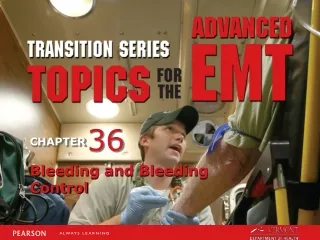
LEARNING OBJECTIVES Upon completion of this course, you will be able to: • Define shock and identify the different types of shock. • Discuss the signs, symptoms and treatment for shock. • Describe the three types of external bleeding. • Discuss the four ways to control bleeding. • Properly control bleeding and dress a wound utilizing the Emergency Bandage. • Stop bleeding with the SOF Tactical Tourniquet.
Instructor Contact Information If you have questions regarding this course, please contact Kevin O’Loughlin, MICP, EMS Specialist. Phone (209) 468-6818. Email: koloughlin@sjgov.org. A response will be provided within 48 hours.
Routine Medical Care • Routine Medical Care is provided to all patients regardless of presenting complaint. • Standard precautions: • Application of body substance isolation precautions including the use of appropriate personal protective equipment (PPE) shall apply to all patients receiving care, regardless of their diagnosis or presumed infectious status
Routine Medical Care • Body substance isolation precautions apply to: • Blood; • All bodily fluids, secretions, and excretions except sweat, regardless of whether or not they contain visible blood; • Non intact skin; and • Mucous membranes. Standard precautions are designed to reduce the risk of transmission of microorganisms from both recognized and unrecognized sources of infection in the prehospital setting.
Routine Medical Care • Patient Assessment: • Primary Survey – which includes scene survey and ABC’s • Secondary Survey – which includes, history, medications, allergies and a head-to-toe survey. • Initiation of appropriate basic life support (BLS) treatment including, when appropriate: • Monitoring of vital signs: • Initial set. • Repeated every 5 – 10 minutes.
Routine Medical Care • Initiation of spinal precautions. • Administration of oxygen. • Hemorrhage control. • Ensuring ALS transport response. • Initiation of specific treatments in accordance with San Joaquin County EMS Agency Policies and Procedures.
Shock Defined as inadequate perfusion (blood flow) leading to inadequate oxygen delivery to tissues.
Physiology • Basic unit of life = cell • Cells get energy needed to stay alive by reacting oxygen with fuel (usually glucose) • No oxygen, no energy • No energy, no life
Cardiovascular System • Transports oxygen, fuel to cells • Removes carbon dioxide, waste products for elimination from body Cardiovascular system must be able to maintain sufficient flow through capillary beds to meet cell’s oxygen and fuel needs
What is needed to maintain perfusion? • Pump = Heart • Pipes = Blood Vessels • Fluid = Blood
Loss of Volume Pump Failure Pipe Failure How can Perfusion Fail?
Cardiogenic Shock • Pump failure • Heart’s output depends on • How often it beats (heart rate) • How hard it beats (contractility) • Rate or contractility problems cause pump failure
Cardiogenic Shock • Causes • Acute myocardial infarction • Very low heart rates (bradycardias) • Very high heart rates (tachycardias)
Neurogenic Shock • Spinal cord injured • Loss of peripheral resistance • Vessels below injury dilate
Hypovolemic Shock • Loss of volume • Causes • Blood loss: trauma • Plasma loss: burns • Water loss: Vomiting, diarrhea, sweating, increased urine, increased respiratory loss
Psychogenic Shock • Simple fainting (syncope) • Caused by stress, pain, fright • Heart rate slows, vessels dilate • Brain becomes hypoperfused • Loss of consciousness occurs
Septic Shock • Results from body’s response to bacteria in bloodstream • Vessels dilate, become “leaky”
Anaphylactic Shock • Results from severe allergic reaction • Body responds to allergen by releasing histamine • Histamine causes vessels to dilate and become “leaky”
Restlessness, anxiety Increased pulse rate Decreasing level of consciousness Rapid, shallow respirations Nausea, vomiting Thirst Diminished urine output Dull eyes Shock:Signs and Symptoms
Hypovolemia will cause Weak, rapid pulse Pale, cool, clammy skin Cardiogenic shock may cause: Weak, rapid pulse or weak, slow pulse Pale, cool, clammy skin Neurogenic shock will cause: Weak, slow pulse Dry, flushed skin Sepsis and anaphylaxis will cause: Weak, rapid pulse Dry, flushed skin Shock: Signs and Symptoms
Shock:Signs and Symptoms • Patients with anaphylaxis will usually: • Develop hives (urticaria) • Itch • Develop wheezing and difficulty breathing (bronchospasm)
Shock: Signs and Symptoms Shock is NOT the same thing as a low blood pressure! A falling blood pressure is a LATE sign of shock!
Shock: Signs and Symptoms • Obscure/less viewed symptoms of shock • Drop in end tidal carbon dioxide (ETCO2) level • Indicative of respiratory failure resulting in poor oxygenation, therefore, poor perfusion or Shock
Treatment • Secure, maintain airway (ABC’s) • High concentration oxygen • Assist ventilations • Control obvious bleeding • Stabilize fractures • Replace Fluids (paramedics only) • Prevent loss of body heat • Transport rapidly to appropriate facility
Treatment • Elevate lower extremities 8 to 12 inches Treatment in Hypovolemic shock • Do NOT elevate the lower extremities in Cardiogenic shock • Administer nothing by mouth, even if the patient complains of thirst
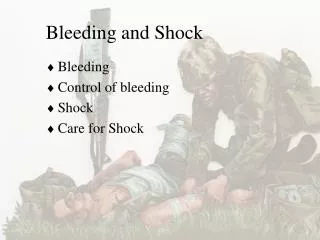
Bleeding • Severe bleeding or hemorrhage is a major cause of shock (hypoperfusion), which can be life threatening if the body loses an excessive amount of blood. • If the body loses enough blood, the cells of the body will not receive enough oxygen and begin to die. • Once cells begin to die, bigger cells such as organs will also fail and eventually the entire body will fail and death will occur.
Control of External Bleeding • Direct Pressure • gloved hand • dressing/bandage • Elevation • Arterial pressure points • Tourniquet (last resort)
Three Types Of External Bleeding: • Arterial • Venous • Capillary bleeding
Arterial bleeding Usually bright red in color because it is rich in oxygen. Bleeding from an artery is often profuse and spurting due to the high pressure from the heart as it contracts, forcing blood out to the rest of the body. This is the reason why it is so hard to control and direct pressure will be required all the way to the hospital.
Venous bleeding • Usually dark red/maroon in color because it does not contain much oxygen. • The red blood cells have already left its oxygen behind with the cells of the body, picked up carbon dioxide and wastes, and are on their way back to the lungs to get rid of them and pick up more oxygen. • It is usually easy to control venous bleeding because the veins are under low pressure. • The main difficulty with venous bleeding is in the neck because it can actually suck in air and cause further complications.
Capillary bleeding • Usually slow and oozing due to their small size and low pressure. • Although there may be a significant amount of bleeding, the majority of capillary bleeding is considered to be minor and is easy to control. • Capillary bleeding is usually the result of an abrasion. • The color of capillary bleeding can be bright red or darker red depending on the amount of oxygen it is carrying. • The majority of problems that arise with capillary bleeding is infection due to due to contaminants becoming embedded in the skin.
Direct pressure is applied to the injury with sterile gauze. If bleeding is profuse or seeps through the gauze, add more gauze, but do not remove the existing pieces. This will prevent the clotting process from being interrupted Direct Pressure
If bleeding continues to be severe, the extremity or body part should be elevated above the level of the heart. This will decrease the amount of blood flowing to the injury site by using gravity to help decrease the amount of blood flow. Elevation
If bleeding continues, add more gauze to the existing dressing and tie a pressure bandage to the site of injury. Bleeding Continues
If direct pressure, elevation, and pressure bandage fail to control bleeding, apply pressure to a pressure point of the injury if it is to an extremity. This will aid in further decreasing the flow of blood to the injury site. Pressure Points
Pressure Points www.armystudyguide.com
Tourniquet • A tourniquet should only be applied after all other means have failed to control life threatening blood loss . • Tourniquets are to be used in rare circumstances and only by trained EMS personnel. Once applied a tourniquet may only be removed by direct physician order. • Application of a tourniquet greatly increases loss of limb below the tourniquet since blood flow is stopped to the area.
Complicated and takes more than two hands to apply correctly Simple one handed application OLD VS. NEW
SOF Tactical Tourniquet Components Windlass Safety Screw Windlass Strap Buckle Tri-Rings Strap
1. Pull Strap until Tourniquet is tight around the injured extremity 2. Twist the aluminum windlass until the bleeding is controlled Applying the SOF Tactical Tourniquet
3. Secure the windlass in the tri-ring 4. Tighten the safety screw Applying the SOF Tactical Tourniquet
It is not necessary to secure the windlass on both tri-rings. Once secured reassess the limb for bleeding. Document the time the tourniquet was applied on the PCR or START triage tag. Applying the SOF Tactical Tourniquet
SOF Tactical Tourniquet Training Video To view video click on link below: Note: The first link is required for this course, the second video link provides additional instruction on the use and care of the tourniquet. SOF Tactical Tourniquet Application • SOF Tactical Tourniquet Instruction Answers to some exam questions come from this video