Download

1 / 50
590 likes | 924 Views
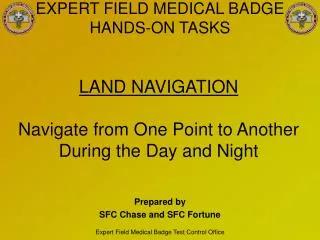
NAVIGATE FROM ONE POINT ON THE GROUND TO ANOTHER POINT WHILE DISMOUNTED. 071-329-1006. PRESENTED BY:. TrainingNCO.com. CONDITIONS:. Given a standard topographic map of the area, scale 1:50,000, a coordinate scale and protractor, a compass, and writing materials. STANDARDS:.

E N D
NAVIGATE FROM ONE POINT ON THE GROUND TO ANOTHER POINT WHILE DISMOUNTED 071-329-1006 PRESENTED BY: TrainingNCO.com
CONDITIONS: • Given a standard topographic map of the area, scale 1:50,000, a coordinate scale and protractor, a compass, and writing materials.
STANDARDS: • Move on foot to designated points at a rate of 3,000 meters per hour.
PERFORMANCE STEPS • Determine your pace count. • Navigate from one point to another using terrain association. • Navigate from one point to another using dead reckoning. • Navigate from one point to another by comparing and combining terrain association with dead reckoning.
Determine your pace count • When traveling on foot, measure distance by counting paces. The average soldier uses 116 paces to travel 100 meters. Check your pace length by practicing on a known 100-meter distance, like a football field plus one end zone, which is 110 yards (about 100 meters).
Determine your pace count • When traveling cross-country as in the field, you use more paces to travel 100 meters, usually about 148 instead of 116. This is because you are not traveling over level ground, and must use more paces to make up for movement up and down hills. Pace yourself over at least 600 meters of crisscrossing terrain to learn how many paces it takes you to travel an average 100 meters over such terrain.
Determine your pace count • Be sure you know how many paces it takes you to walk 100 meters on both level and crisscrossing terrain. • The problem in pacing is maintaining a straight line. At night, you will tend to walk in a clockwise circle if you do not use a compass. In daylight, you should use aiming points and a compass. Also, remember to figure only the straight-line distance when you have to walk around an obstacle.
Determine your pace count • Be sure you know how many paces it takes you to walk 100 meters on both level and crisscrossing terrain. • Another problem is keeping count of paces taken. One way is to use pebbles. For instance, suppose you want to pace off one kilometer. (A kilometer is 1,000 meters or the distance between two of the black grid lines on the map.) Put 10 pebbles in your right pocket. When you go 100 meters, move one pebble to your left pocket and start your count over. When all 10 pebbles had been moved to your left pocket, you have traveled one kilometer. Or, tie knots in a string, one knot per 100 meters.
Determine your pace count • Sample problem: You are to move 715 meters, and your pace count for 100 meters is 116 paces. Using the pebble methods, you will need seven pebbles. This will take you 700 meters. But what about the other 15 meters?
Determine your pace count • Sample problem: You are to move 715 meters, and your pace count for 100 meters is 116 paces. To determine how many paces it will take to go the remaining 15 meters, multiply 15 meters by your pace count (116—15 x 116 = 1,740). Mark out the last two numbers (40). The remainder (17) is how many paces it will take to go 15 meters.
Determine your pace count • Sample problem: You are to move 715 meters, and your pace count for 100 meters is 116 paces. So you would go 715 meters using the pebble method by pacing off 116 paces per 100 meters until all seven pebbles are used, then go an additional 17 paces to arrive at 715 meters.
PERFORMANCE STEPS • Determine your pace count. • Navigate from one point to another using terrain association. • Navigate from one point to another using dead reckoning. • Navigate from one point to another by comparing and combining terrain association with dead reckoning.
Navigate from one point to another using terrain association This technique uses terrain or man-made features to serve as landmarks or checkpoints to maintaining direction of movement. Use this technique anywhere, day or night, as long as the terrain has distinguishable features. You use terrain association when moving from the unit area to the motor pool. You walk down the road or sidewalk using intersections or buildings to steer or turn on (landmarks or checkpoints). In the field, with few roads and buildings, use terrain features for your axis and checkpoints.
Navigate from one point to another using terrain association • Locate your position on the map, and then locate your destination or objective. A straight line between the two is seldom be the best way to travel. For example, look at Figure 1. Assume that you are to move from point A to point B. Notice that traveling a straight line between them might take you through several ridges and valleys (the "Xs" on Figure - 1). Figure 1 Straight Line Route
Navigate from one point to another using terrain association • When adjusting your route, consider the following: Tactical aspect. Avoid skylining open areas and danger areas like streams or crossings on roads and hilltops. Your tactical concern is survival. The mission is causing you to move to your objective. Figure 1 Straight Line Route
Navigate from one point to another using terrain association • When adjusting your route, consider the following: You need to be sure you get to that objective. Looking at Figure - 2, you decide for tactical reasons to cross the stream where you would not be seen from the road (C) and to cross the road in a small valley (D). You know that valleys offer better cover and concealment, so you will use them (E) (F). Figure 2 Adjusted Route
Navigate from one point to another using terrain association • When adjusting your route, consider the following: Ease of movement. Always pick the easiest route that the tactical situation allows. However, you achieve surprise by doing the unexpected. A difficult route increases your chance of getting lost. A difficult route may be noisy and may tire you out before you get to your objective. Figure 2 Adjusted Route
Navigate from one point to another using terrain association • When adjusting your route, consider the following: Boundaries. It is almost impossible to travel in a straight line, with or without a compass. Pick an axis or corridor to travel along. Pick boundaries you will be able to spot or feel. Hard-top roads, streams, high grounds, and railroads all make good boundaries. If you start to wander too far off course, you will know it. Figure 2 Adjusted Route
Navigate from one point to another using terrain association • You decide the route shown in Figure - 3 offers you easy movement. You check your axis up the valley (1); across the ridge at the saddle (2); cross the stream and turn left, keeping the stream on the left and high ground on the right (4); to the third valley (5); to the saddle, then on to the objective (6). Figure 3 Route of Travel
Navigate from one point to another using terrain association • With boundaries to keep you straight, you need to know where, along your corridor, you are. You do this with checkpoints. The best checkpoint is a line or linear feature that you cannot miss. A linear feature across your corridor, or axis, is crossed no matter where you are in the axis. Use hard-top roads, railroads, power lines, perennial streams (solid blue lines, the dash blue lines are frequently dry), rivers, ridges, and valleys. Note: DO NOT use light-duty roads and trails; there are always more on the ground than the map shows. DO NOT use wood lines, which are rarely permanent.
Navigate from one point to another using terrain association • Referring to Figure - 3, check your distances: 500 meters to the saddle (1). 800 meters to the stream (2). 500 meters to the bend in the stream (3). 300 meters to the road (4). 1,000 meters to the far saddle (5). Figure 3 Route of Travel
Navigate from one point to another using terrain association • If you cannot find linear features, use an elevation change - a hill or depression, a small ridge, or a valley, or a valley. Look for one contour line of change during the day, two at night. Regardless of contour interval, you will spot a contour interval of change on foot.
Navigate from one point to another using terrain association • Determine the distance between checkpoints. DISTANCE IS THE CAUSE FOR MOST NAVIGATIONAL MISTAKES. Estimate or measure the distance from one checkpoint to another, then trust that distance.
Navigate from one point to another using terrain association • Refer to Figure - 4 and check your distance. 500 meters to the saddle (1). 800 meters to the stream (2). 500 meters to the bend in the stream (3). 300 meters to the road (4). 1,000 meters to the far saddle (5). Figure 4 Checkpoints
PERFORMANCE STEPS • Determine your pace count. • Navigate from one point to another using terrain association. • Navigate from one point to another using dead reckoning. • Navigate from one point to another by comparing and combining terrain association with dead reckoning.
Navigate from one point to another using dead reckoning • Dead reckoning is a technique of following a set route or line for a determined distance. Use this technique on flat terrain such as deserts and swamps. You can use this technique day or night. To use dead reckoning. Locate the start and finish points on the map Figure - 5. Figure 5 Distance between Checkpoints
Navigate from one point to another using dead reckoning Locate the start and finish points on the map Figure - 5. Determine the grid azimuth from the start point to the finish point or the first intermediate point on the map. Convert the grid azimuth taken from the map to a magnetic azimuth. Figure 5 Distance between Checkpoints
Navigate from one point to another using dead reckoning Determine the distance between the start and finish points or between any intermediate points on the map. Convert the map distance to pace count. Make a thorough map reconnaissance of the area between the start point and the finish point. Figure 5 Distance between Checkpoints
Navigate from one point to another using dead reckoning Before moving from the start point, shoot an azimuth on a well defined object on the ground in the direction of travel. These objects, known as steering points, may be lone trees, building, rocks, or any easily identifiable point. At night, the most likely steering point will be a star. Due to the rotation of the earth, the positions of the stars continually change. You must check your azimuth frequently, but only when halted. Using your compass while you are moving with cause you to go off course. Your steering mark might be beyond your objective. Remember to travel the distance you determined. Figure 5 Distance between Checkpoints
Navigate from one point to another using dead reckoning Once you have selected a steering point, you should move toward it, remembering to begin your count. For every 100 meters you travel, you should have some method of tracking the number of 100 meters you travel. Upon reaching your first steering point, shoot an azimuth to another steering Figure 5 Distance between Checkpoints
Navigate from one point to another using dead reckoning If you should encounter an obstacle, you might have to detour around it Figure - 6. To do this , complete a series of 90 degree turns until you bypass the obstacle and return to your original azimuth. At the edge of the obstacle, make a note of the number of paces taken to this point. To detour to the right, add 90 degrees to your original azimuth. Using the new azimuth, pick a steering mark and move it toward it, making sure you begin a new pace count. Move on this azimuth until you reach the end of the obstacle.
Navigate from one point to another using dead reckoning If you should encounter an obstacle, you might have to detour around it Figure - 6. To do this , complete a series of 90 degree turns until you bypass the obstacle and return to your original azimuth. Stop and note the number of paces taken, and again add or subtract 90 degrees from the azimuth just read, and move to the far side of the obstacle. Upon reaching the far side, stop the count and note the number of paces taken; add this number to the pace count noted in step (1).
Navigate from one point to another using dead reckoning If you should encounter an obstacle, you might have to detour around it Figure - 6. To do this , complete a series of 90 degree turns until you bypass the obstacle and return to your original azimuth. Again add or subtract 90 degrees from the azimuth used, and then move the same number of paces you took on the first leg of your offset or detour. Place the compass on your original azimuth, pick up the pace count you ended with when you cleared the obstacle, and proceed to your finish point.
Navigate from one point to another using dead reckoning Bypassing the same obstacle at night calls for special consideration: • To make a 90 degree turn, hold the compass as you would to determine a magnetic azimuth. • Turn until the center of the luminous letter "E" is under the luminous line (do not change the setting of the luminous line). • NOTE: If you turn to the right, "E" is under the luminous line. If you turn to the left, "W" is under the line. • Proceed in that direction until you outflank the obstacle. • Turn until the north arrow is under the luminous line, and then proceed parallel to your original course until you have bypassed the obstacle.
Navigate from one point to another using dead reckoning Bypassing the same obstacle at night calls for special consideration: Turn until the "W" is under the luminous line and move back the same distance you originally moved. Finally, turn until the North arrow is under the luminous line, and then proceed on your original course. You must count your paces just as you do when you bypass an obstacle in daylight.
Navigate from one point to another using dead reckoning After reaching the finish point, conduct a detailed terrain analysis to confirm your location.
PERFORMANCE STEPS Navigate from one point to another by comparing and combining terrain association with dead reckoning.
NAVIGATE FROM ONE POINT TO ANOTHER BY COMPARING AND COMBINING TERRAIN ASSOCIATION WITH DEAD RECKONING. • You will often have to consider the advantages and disadvantages of each technique. • Terrain association is fast and easy, and it allows for mistakes. It also is subject to map accuracy and can only be used with recognizable terrain features.
NAVIGATE FROM ONE POINT TO ANOTHER BY COMPARING AND COMBINING TERRAIN ASSOCIATION WITH DEAD RECKONING. • You will often have to consider the advantages and disadvantages of each technique. • Dead reckoning is accurate and works on flat terrain that lacks terrain features; however, all work must be precise, and the technique takes time.
NAVIGATE FROM ONE POINT TO ANOTHER BY COMPARING AND COMBINING TERRAIN ASSOCIATION WITH DEAD RECKONING. • Sometimes you will have to combine the techniques. For instance, in the desert, you might need to use dead reckoning to arrive at or near a road or ridge, and then use terrain association to follow that feature to an objective.
CHECK ON LEARNING: • QUESTIONS?
EVALUATION PREPARATION: • SETUP: Select an area with varying terrain and vegetation and large enough to have two points, 1,000 meters to 2,000 meters apart. Ensure each point is on or near an identifiable terrain feature and marked on the ground with a sign containing a letter or number. Place dummy signs not less than 100 meters but not more than 200 meters to the right and left of the correct point. Clearly mark correct points on the map. Prepare a sheet of paper giving the azimuth and distance for each leg of the course to be covered. Have pencils available for the tested soldier.
BRIEF SOLDIER: • Terrain Association • Dead Reckoning
BRIEF SOLDIER: • Terrain Association Give the soldier the map and tell him to identify the best route to take between the two points plotted on the map (1,000 meters to 2,000 meters apart). Note: The best route must have been determined by an SME be ore the test.
BRIEF SOLDIER: • Terrain Association Give the soldier the map and tell him he must move from point A to point B (1,000 meters to 2,000 meters apart) using terrain association (no compass is used). Tell the soldier he has _______ (standard in minutes and/or hours) to complete the course.
BRIEF SOLDIER: • Dead Reckoning Give the soldier the sheet of paper with the azimuth and the distance for each leg of the course (three to five points, 200 meters to 500 meters apart), and the compass; no map will be used. Tell the soldier to move over the course shown by the azimuth and the distance on the paper. Tell the soldier to record the letter or number at the end of each leg of the course. Tell the soldier he has ______ (standard in minutes and/or hours) to complete the course.
BRIEF SOLDIER: • Dead Reckoning Note: Time standards are based on the average time it takes two SMEs to complete the course plus 50 percent. For example, if the SME time is one hour, course test time is one hour and 30 minutes. SME time (1 hour) + 50 percent (30 minutes) = course test time of one hour and 30 minutes.
BRIEF SOLDIER: • Dead Reckoning Tell the soldier he has 10 minutes to study the map and determine a course of action. At the end of this time, he will move to the start point and begin the test. Time starts when soldier leaves the start point and ends when he crosses the finish point.
REFERENCES: • REQUIRED: FM 3-25.26 STP 21-1-SMCT
NAVIGATE FROM ONE POINT ON THE GROUND TO ANOTHER POINT WHILE DISMOUNTED 071-329-1006 PRESENTED BY: TrainingNCO.com