Download
1 / 82
860 likes | 1.07k Views
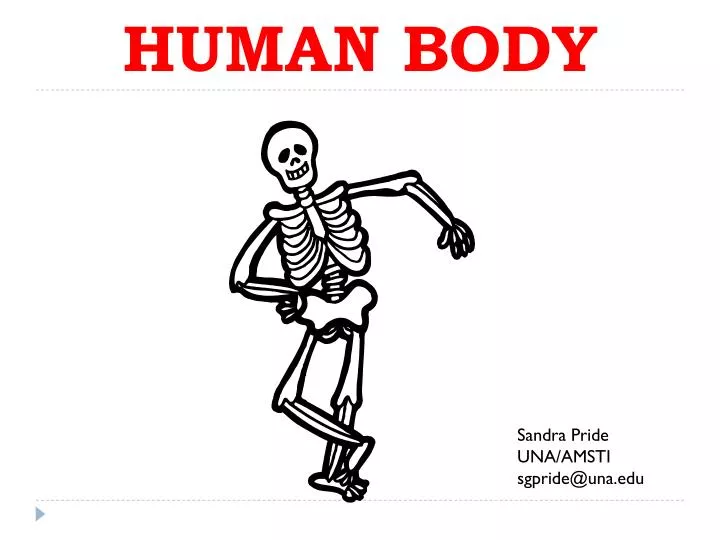
HUMAN BODY. Sandra Pride UNA/AMSTI sgpride@una.edu. Humor. Humor. Our Brain. BONES. Investigation 1 Part 1. Take turns with your partner jumping rope. When your partner is jumping, watch closely to see which parts of his/her body come into action.

E N D
HUMAN BODY Sandra Pride UNA/AMSTI sgpride@una.edu
BONES Investigation 1 Part 1 • Take turns with your partner jumping rope. When your partner is jumping, watch closely to see which parts of his/her body come into action. • Record your observations by writing down what you see in your journal. Label this page “Body Parts That Move When I Jump Rope” Try to discover which parts of the body move when a person jumps rope. • Create a class chart.
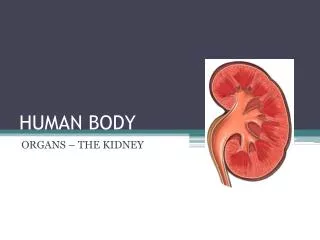
Investigation 1 Part 1 HOW MANY BONES? A Skeletal system is a group of bones. Let’s count up the bones to find out how many there are in the human skeleton. • Working with your group you will count the bones in the subsystem you are assigned. Record your count in your journal. • Leg and Foot • Arm and Hand • Head • Torso (including the NECK, SHOULDERS, and HIPS)
Investigation 1 Part 1 BONE COUNT
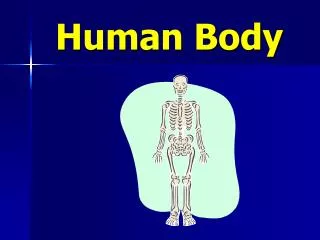
Investigation 1 Part 1 Skeleton • Skeleton Photograph • Functions of our skeleton: SUPPORT PROTECTION MOVEMENT
RECOUNT Investigation 1 Part 1 • Using your subsystem poster and the Counting Bones sheet, recount the bones for your assigned subsystem to see if you can get a more accurate count. • Rotate group assignments. You should record the number of bones in all four skeleton subsystems. • Revise the bone count on the class chart.
Investigation 1 Part 1 BONE COUNT
Investigation 1 Part 1 Science Notebook Science Notebooks Science Notebook Design Set-Up • The first page is the cover page. You will design a cover for your notebook. • The next two pages will be labeled the “Table of Contents.” • The third/next page is where we will begin our journal entries. • Write the date in the upper right hand corner and the page number. • Turn to the back of your journal. We will label the third page from the end the “Glossary”
Investigation 1 Part 1 VOCABULARY • Bones Cartilage Joint • Skeleton Skull Torso • ADD these words to your GLOSSARY. Discuss the meanings with your partners. Next, write a definition for each word.
Investigation 1 Part 1 Content/Inquiry • The function of the skeleton is to provide support, protection, and movement • The human skeleton has about 206 bones
Investigation 1 Part 1 Skeleton Functions Foldable
Investigation 1 Part 1 Science Reading Stories • A Marvelous Machine pages 1-3.* • The Shape of Your Shape page 4.
Initiate Question Engage Explore Evaluate Apply Clarify Extend Explain “The 5 E’s” The Learning Cycle
“Mr. Bones” Investigation 1 Part 2 • Each of you will receive a skeleton puzzle called “Mr. Bones to assemble. • Cut out each of the 19 pieces. Use a hole punch to punch out the black circles on each piece. Use paper fasteners to hold the pieces together. GOOD LUCK! • Compare your puzzle to the skeleton poster. • Fossweb • Response Sheet – Bones #6
Investigation 1 Part 2 Science Reading Stories • The Broken Radius pages 5-7.
Investigation 1 Part 2 What did Laura do wrong?
Investigation 1 Part 2 Skeleton Book Foldable
Investigation 1 Part 3 SIMON SAYS
Barn Owls Investigation 1 Part 3 • Science Story page 9.* BARN OWLS • Owls eat small rodents but cannot digest the fur and bones. The owl then coughs up or regurgitates a pellet containing the fur and bones. http://www.kidwings.com/owlpellets/flash/v4/index.htm
Owl Pellets Investigation 1 Part 3 Procedure for observing pellets: PUT ON GLOVES!! • Unwrap the foil and remove the pellet. • Observe the whole pellet: Notice the shape, color, and texture of the pellet. WRITE and DRAW your observations on the Owl-Pellet Observation Sheet #7. • Gently separate the pellet into two pieces. Place each piece on the paper plate. • Separate the bones from the fur and other material using your fingers or toothpicks.
Investigation 1 Part 3 Rodent Bone Identification • Using the Rodent Bone Identification Sheet #8 sort your collection of bones. • Reconstruct your skeletons. You may glue them to the sheet. • You may or may not have a complete skeleton.
Investigation 1 Part 3 Content/Inquiry • Bones of many mammals are similar in number and shape, but differ in size • The shape of a bone is often a clue to its function
Investigation 2 Part 1 Review • How many different ways can you move your body? • What is the human skeleton and what is it made of? • What are the functions of the skeleton? • Where does your body bend?
Investigation 2 Part 1 Thumb Joints • Look at Student Sheet #9. There is a picture to color and a maze to trace. There is also a list of everyday tasks. All of these tasks require movement of the joints in your hand. • These seem like simple tasks. However, you must complete these without using your thumb. It Will Be Taped!!!!
Investigation 2 Part 1 What Did You Discover? • Which tasks were hard to do? • What made them hard? • How did you solve the problem? • How did you feel when you ran into a hard task? • What are the advantages of an opposable thumb?
Investigation 2 Part 1 Vocabulary • Joint • articulated • Immobilize • Opposable Thumb ADD these words to your GLOSSARY. Discuss the meanings with your partners. Next, write a definition for each word.
Investigation 2 Part 1 Content/Inquiry • Thumbs are essential for performing everyday task easily
Investigation 2 Part 1 Science Reading Stories • Read Your Amazing Opposable Thumb page 10 Saddle Joint Of the THUMB Carpals Metacarpals Phalanges
Investigation 2 Part 2 Joint Tasks Finding out more about the joints in our hands. There are eight tasks for each member of your group to perform. There is a card in each bag explaining what you should do. When you finish a task all of the materials used should be returned to the bag. WHAT’S THE CATCH???
Investigation 2 Part 2 Joint Tasks Your Joints will be IMMOBILIZED!!! STIFF THUMB: Lay a craft stick along the back of your thumb. Wrap tape around the stick and thumb, make sure the tip of the thumb is taped. Next, wrap tape around the stick and your wrist. STIFF FINGERS: Wrap tape around the middle and index fingers twice. The tape should not be tight. Slip a dowel under the tape in the space between the backs of the fingers. Wrap tape around the wrist and dowel at the other end of the dowel.
Investigation 2 Part 2 Joint Tasks • Which task do you think was the easiest? Why? • Which task do you think was the hardest? Why?
Investigation 2 Part 2 Content/Inquiry • Articulated hands and opposable thumbs are essential for performing intricate tasks
Investigation 2 Part 2 Science Reading Stories Bones on the Outside? Page 11
Investigation 2 Part 3 Naming Joints Are all of your joints the same? Do they all move the same way? There are several kinds of joints in the body, and two of them are found in the hand. Hinge joint: The simplest kind of joint. They can flex (close) and extend (open) like a door. Ball-and-socket joint: The most versatile joint. They can move in three ways: up and down, front to back, and they can rotate. Gliding joints: They allow movement in two directions, but not rotation.
Investigation 2 Part 3 Identifying Joints • Look at the photo of the skeleton. Can you label the skeleton’s joints? • Your group will look at one of the subgroups: arms/hands skull legs/feet torso • With your group identify major joints in the body using sheet #3, Bone Names, to help you. Write the name of the joints you identify on a sticky note. • Label joints on the poster. HingeBall-and-socketGliding
Investigation 2 Part 3 Response Sheet- Joints Read student sheet #12. Can you help Carl?
Investigation 2 Part 3 Vocabulary • Compensate • Ball-and-socket joint • Hinge joint • Gliding joint ADD these words to your GLOSSARY. Discuss the meanings with your partners. Next, write a definition for each word.
Investigation 2 Part 3 Content/Inquiry • The human skeleton has three basic types of joints: hinge, ball-and-socket, and gliding joints • Hinge, ball-and-socket, and gliding joints allow the body to move in many different ways
Investigation 2 Part 3 Types of Joints Foldable
Investigation 2 Part 3 Science Reading Stories • Comparing Joints? Pages 12-13
Investigation 2 Part 4 Comparing Bones Can you put the bones together? Chicken Bones Rodent Bones Use your bones to complete student sheet #13.
Investigation 3 Part 1 Muscles
Investigation 3 Part 1 Muscles • Muscles are responsible for all body movements. Nothing moves unless a muscle is working. • When muscles work they contract. That means when they work they become shorter and feel tight and solid. If a muscle is attached to two bones they will be pulled toward each other when the muscle contracts.
Investigation 3 Part 1 Muscles There are over 650 skeletal muscles in the human body.