Download
1 / 7
70 likes | 72 Views
Steps to Printing on Canon MAXIFY MegaTank GX7020X Printer. For more assistance on Canon printers, reach our tech experts at 1-909-751-0101.<br>

E N D
How To Print On Canon MAXIFY GX7020X The universe is moving toward digitalization. However, a couple of people still prefer printing for personal, general, and business purposes. The printer manufacturers are trying their best to provide memorable printing experiences for their users. Almost all the latest printers available on the market offer cool printing features, like wireless printing, mobile printing, printing from a USB drive, and much more. Printing a document on a multi-functional printer is not a big deal. Here, we will show you how to print on a Canon MAXIFY GX7020X printer. Is this your first printing experience with the Canon MAXIFY GX7020 printer? Yes? Then, that’s okay. We have your back covered. We will assist you throughout the printing process. So, are you reading? Let’s get started! Things To Do For A Successful Printing Experience A small mistake while printing for the first time can drain all your excitement. You can avoid facing issues and print your document or image with your printer using the simple tips mentioned below. We’ve talked about it in this section. You can print a document or image in no time if the devices (printer, computer, or smartphone) are well prepared for it. Preparing the devices for printing is straightforward. Begin by turning on your printer. ● Do you want to set up your Canon MAXIFY GX7020X printer? Yes? That’s alright. You can do it now with real-time assistance from our ● technical expert. Get in touch with us now by clicking the toll-free button provided for more details. You may face an incompatibility issue if your computer’s operating system doesn’t meet the system requirements of the printer. You can ● avoid this issue by updating or installing the right printer driver and also keeping your computer’s operating system up-to-date. Ensure that your computer and the MAXIFY printer are connected to the same network. ● Loading the right media type is also paramount. Do you want to learn more about it? If yes, refer to the instructions given under this page’s ● “loading paper” section. You may need more ink if you print a huge document volume. So check the ink levels of the printer by visually inspecting the remaining ink in ● the ink tank. If you find the ink level is low, kindly refill it before you start printing. Loading Paper In this section, we will discuss what kinds of papers you load and how to load them into your Canon printer. Are you ready? Let’s get into it. The Canon MAXIFY GX7020X printer is compatible with the following paper types: ● Plain: Plain paper and high-resolution paper ● Glossy: Photo Paper Plus Glossy II and Photo Paper Glossy ● Photo Paper Plus Semi-Gloss and Photo Paper Pro Luster are both semi-gloss papers. ● Matte Photo Paper and Double-Sided Matte Paper ●
Other Canon Papers: Magnetic Photo Paper, Restickable Photo Paper, and Light Fabric Iron-on Transfers ● Other (non-Canon): greeting cards, envelopes, recycled paper, and chlorine-free paper. ● However, this differs based on the paper source you’re using. ● Rear tray: You can load almost all the paper types into the printer’s rear tray. ● Cassette 1: Use this cassette to load and print on A4, B5, A5, letter-sized, or executive plain paper. ● Cassette 2: Use this cassette if you want to print on A4 or letter-sized plain paper. ● Loading paper into this printer is easy. ● First, prepare the paper that you wish to load. ● Next, open the printer’s rear tray cover if you want to load paper into it. You will find the paper support, pull it up, and then open the paper ● guides. Have you done it? If yes, place the prepared paper into the tray with its print side facing up. Ensure to align the width guides properly. All right ● there? We hope that you have aligned the guides correctly. Overloading the tray might lead to paper jams and other paper-feed-related issues. So, load the papers only up to the maximum limit. ● The printer will automatically detect the media type that you have loaded into the tray. Once the printer recognizes the type of paper loaded, ● the “Current rear tray settings” screen will open. Can you see it on your printer screen? If so, confirm the paper type by tapping the Yes button. Is the wrong paper type detected? No problem. Tap on the Change button to manually ● set the paper settings. Similarly, load the paper with its print side facing down in cassettes 1 and 2 of your printer and save the paper ● settings. It’s that simple. We believe that you have prepared your printer for printing and found the information above useful. Without further waiting, let’s see how to print on the MAXIFY GX7020X. Printing From Your Computer Are you done with the Canon MAXIFY GX7020X set up and ready to see how well your printer can print? Yes? Then your wait is over. After the setup, you can start printing the document or image of your preferences from your computer, smartphone, or the printer’s control panel. This section will help you learn how to print from your computer to the printer. If everything is set, let’s get started. Apple Airprint Are you using the latest Mac OS that supports the AirPrint feature? If so, you can use the same method to initiate the print job from your Mac computer to the Canon MAXIFY GX7020X printer. However, before you start printing, check whether your printer is installed on your Mac computer. If not, kindly add it. This way, you can perform the “smooth print” operation with your printer. This section will teach you how to check and add (if necessary) a printer to your Mac computer and print with it. Checking And Adding The Printer
We all know that we can add, remove, and access any printer on a Mac from a single screen called “Printers and Scanners.” ● Use the same screen if you want to check whether the printer is installed on your computer. ● Launch the Printers & Scanners screen. Is your printer name displayed under the “Printers” section? If yes, you can start printing. ● Or else, click the Plus (+) icon under the Printers section to manually add your printer. ● Printing From Mac Printing from a Mac using AirPrint is easy. You can do it in a few seconds by following the instructions below. Ensure that your Canon printer is powered on. ● Now, open the image, file, or page you want to print on your computer. Have you done it? If so, open the Print dialog box from the menu list or ● by pressing the Command-P key combination. Now, the Print dialog box, as shown below, will open. ● Here, the first thing you must ensure is that your printer model is selected correctly. ● After doing that, you can set the presets, number of copies, pages you want to print, etc. ● Do you want to improve the page setup settings? If so, click the Page Setup or Edit Page Setup button on the Print dialog box. ● After you’ve finished configuring the print settings, click the Print button. ● The printer will start printing your file, page, or image as soon as you click Print. It is that simple and fast. Printing Using The Windows Printer Driver Are you looking to print a document from your Windows computer to the Canon MAXIFY GX7020X printer? Then, use the Windows Printer Driver. This driver is provided along with the printer’s MP driver. You can start printing if you have already installed it with the MP driver. Or, reinstall the printer’s MP driver on your computer and start printing. Open the original to be printed on your Windows computer. ● Click the Print menu or press the Ctrl and P buttons simultaneously. This will open the Print dialog box. ● We believe that you have opened the Print dialog box. Now, first, ensure that your printer is selected correctly. After that, open the printer ● driver’s setup screen. You can open this screen with a single click. Locate the Properties or Preferences button on the Print dialog box. Have you found it? Yes? ● Click on it to open the printer driver setup screen. Your Canon printer’s printing preferences, as shown below, are open, right? Now, click OK > Print if you wish to continue printing with the ● default print settings.
If you want to print your original with some advanced settings, then set them as per your preferences on the Printing Preferences page and ● click OK > Print. The printer will start the print job within a few seconds after you click the Print button. The printer will take less than a minute to print your document, file, or original. Once the printing is done, you can collect the printouts from the printer’s output tray. Using The Canon Application Software The MAXIFY GX7020X printer from Canon allows you to print files, pages, and images, and it also enables you to print cards, calendars, labels, ID cards, business cards, and much more. You can do all these using the Canon application software called “Easy-PhotoPrint Editor.” This free software from Canon enables you to print and edit various works from your smartphone (iOS or Android) and computer (Windows or Mac). The interesting fact is that you can even print images stored in the cloud using this software. That’s cool! Now, to show you how Canon’s Easy-PhotoPrint Editor tool works, we have outlined step-by-step instructions on how to print calendars with it from a Windows or Mac computer. Please continue reading to learn more about it. Start the Easy-PhotoPrint Editor software on your PC or Mac. Need assistance opening the software? Well, you can do this within a few ● seconds. In Windows 10, open the Canon Utilities folder from the Start menu. If you have Easy-PhotoPrint Editor installed, you will find it here. Click on ● it to open it. On Mac, open Canon Utilities from the Applications window. Select Easy-PhotoPrint Editor > Easy-PhotoPrint Editor by double-clicking it. ● That’s it. The screen will display the Easy-PhotoPrint Editor software screen. You can find a list of options on the New tab of the software’s main screen, right? Click on the Calendars menu since you want to print ● calendars. Now, what do you see? The screen with a list of templates, right? Choose the template of your liking from the list. ● Now, the Select Page Size pop-up dialog box will open. Click Next after selecting the paper size. Select and add photos that you wish to use ● for printing. After doing that, set the other print settings and click Save > Next > Print. ● Is your printer starting to print? Yes? That’s awesome! Congratulations on printing calendars on the MAXIFY GX7020X using the Canon application software. Printing From Chrome Os To Canon MAXIFY GX7020X
Printing is easier and more simple with this Canon MAXIFY printer because it is designed to meet all the printing requirements of Chrome OS users, like Windows and Mac users. Are you excited to print with this Canon printer from your Chromebook? If yes, go through the simple instructions below once before you start printing to make it easy and fast. First Things First Have you set up the printer on your Chromebook? No? That’s alright. You can do it now. Installing a printer in Chrome OS is as simple as pie. ● Connect your devices (Chromebook and printer) to the same network. That’s it. The Chromebook will automatically detect and install your ● printer on it. It’s that simple. How To Print With A Chromebook Have you installed your Canon printer on your Chromebook? If yes, you can start printing right away. ● Open the file, image, or page you want to print, followed by the Print dialog box. ● You will find the destination drop-down menu at the top. Choose your printer from there. Is your printer name not displayed? Then, click ● Manage to manually select your printer. After that, set the paper size, layout, scale, and other print preferences per your liking. Finally, click “Print.” ● This is how to print on the MAXIFY GX7020X from your Chromebook. You printed the desired original from your Chrome OS device by following the instructions above. Smartphone/Tablet Are you a user who loves to access the printer for printer-related needs from your smartphone or tablet? Are you looking for the right method and the correct guide to print an original from your smartphone or tablet to the printer? If yes, this section is for you. You can print images, documents, and any web pages from your iOS or Android smartphone with this Canon MAXIFY printer. You will read more about it in the following sections. So, why wait? Go ahead and read the sections below to learn more. From An Ios Device The printer manufacturer designs no special mobile printing app for iOS devices. However, you can print from your iOS device to the printer using Apple’s AirPrint feature. Using this feature, we have already seen how to print on the MAXIFY GX7020X from a Mac computer. You can use those instructions as a reference to print from your iOS device to the printer using AirPrint. The overall process is the same, even if the OS types are different. However, before you kick off, you must ensure two important things: #1 The printer and your iOS device are connected to the same network. ● #2 Your iOS device supports AirPrint. ●
Are your Canon printer and iOS device ready for printing? If yes, follow the instructions below. Printing using AirPrint is straightforward, and ● you can do it in three simple steps. The first step is to open the page, document, or image you want to print. Have you done it? Yes? Then, go to the second step. ● The second step is to open the Printer Options screen. You can do this with two taps. Locate the Share icon. ● After that, tap on the Print option. We believe that the Printer Options or Printer screen has opened on your iOS device. ● The third and last step is to choose your printer, configure the print settings, and tap Print. ● Your Canon printer will start printing as soon as it receives the print request from your iOS device. From Android The Canon printer manufacturer provides two mobile printing apps for Android users to provide them with an easy and smooth printing experience. In the sections below, you will learn about those apps, how they work, and everything else about them. So, why wait? Let’s get started! First, let us see about apps. After that, we will see how they work. Canon Print Service and Mopria Print Service are the two apps suggested by the printer manufacturer. Both apps are free and can be installed ● from the Google Play Store. After installing the app for your preferences, open and activate it. ● Is the app ready to use? If yes, start printing as discussed below. Mopria Print Service You can print an original in three simple steps with this mobile printing app. Read the instructions below to learn more about it. #1 Open Google Photos, Google Drive, or any app you want to print from and choose the original to be printed. We hope you are doing good. ● Only two steps left. Let’s finish them as fast as possible. #2 Tap on the menu or share icon and choose “Print” or directly tap on the “Print” icon. Now, the Print dialog box is opened, right? ● #3 Choose your printer, set the print settings as per your preferences on the Print dialog box, and tap Print. ● It’s easy and quick. Canon Print Service
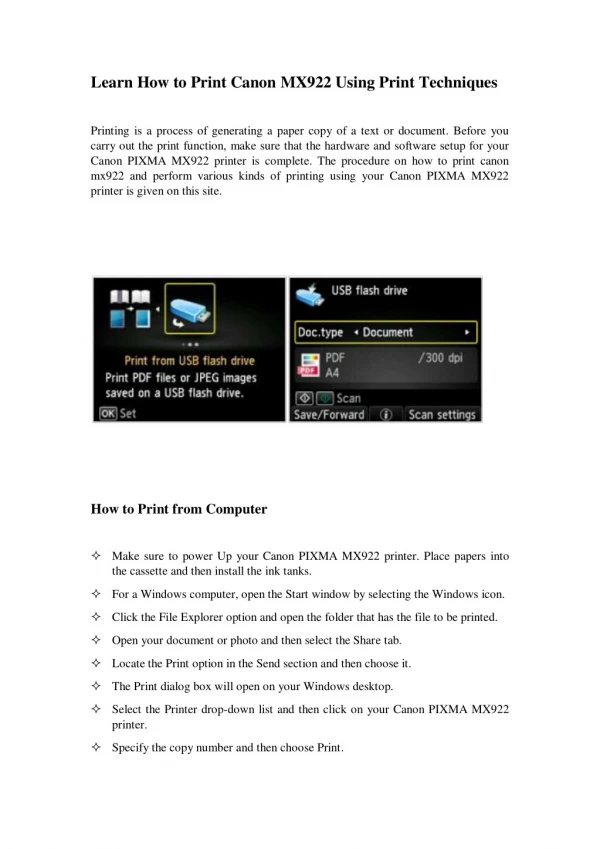
Are you using an Android smartphone running version 4.4.2 or later? If so, this service is included as a print plug-in with your devices. However, in order to print smoothly, you must first install the app. Switch on your Canon printer to begin the print operation if it is turned off. The rest of the steps follow the same guidelines as those covered in the Mopria Print Service part of this page. Do you need real-time assistance in performing the print operation using this service? Yes? Then, get in touch with us now. Printing Photographs From A Usb Flash Drive Is the image you want to print saved on a USB flash drive? Are you searching for the right guide to print from your USB flash drive to the Canon MAXIFY GX7020X printer? Yes? Then, your search ends here. Not only from a computer or smartphone, but you can also print an original from the USB flash drive with this printer. You will read more about it in the section below. Are you new to printing from a USB flash drive? If so, don’t worry. We have your back covered. Printing the original from a USB flash drive is straightforward. First, ensure that your Canon printer is ready for printing. ● Next, insert the USB flash drive into your printer’s USB port. Have you done it? ● If so, tap on the Print menu on your printer’s home screen. ● Now, tap on the “From USB flash drive” option. This will open a screen that allows you to choose the photo you want to print from the drive. ● Select an image. After doing that, set the print preferences. ● Finally, tap the Color button to start printing the selected original with the specified settings. ● Link : https://fixmyprinter.us/how-to-print-on-a-maxify-gx7020x/ Call us : 9097510101