Download

1 / 32
320 likes | 468 Views
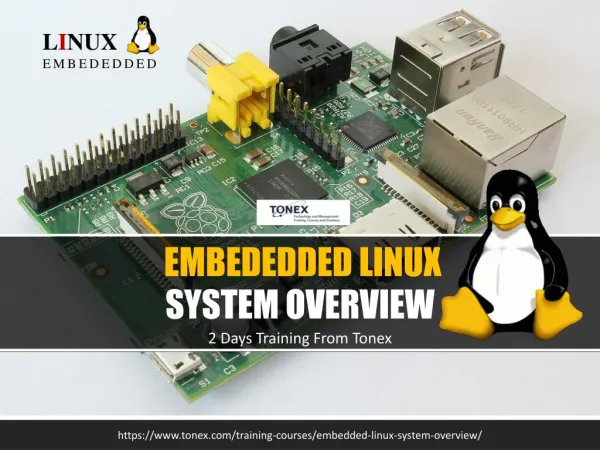
The number of embedded devices that are connected to the internet is growing each day. Nowadays, they are installed majorly using a wireless connection. They need mobile network coverage to be connected to the internet. Read our blog which tells you about the various configurations to connect a device such as Colibri iMX6S with the Colibri Evaluation Board running Linux to the internet through the PPP (Point-to-Point Protocol) link. Read More: https://www.toradex.com/blog/how-to-use-gsm-3g-4g-in-embedded-linux-systems

E N D
CHAIRMAN Introduction Embedded devices connected to the internet are growing every day. In many cases, these devices will be installed somewhere without a wire or wireless network connection. A good way to keep the devices connected to the internet in these situations is by seeking mobile network coverage. Therefore, this blog post will present the necessary configurations to connect a device running Linux to the internet through the PPP (Point-to-Point Protocol) link.andoptimize cost. In simple terms, modularity means that a system can be built by assembling many small units.
CHAIRMAN Hardware Specification In this article we will be using the Colibri iMX6S with the base board called “Colibri Evaluation Board”, both of which, are from Toradex. The Colibri Evaluation Board is recommended specifically for project evaluation and development. This product comes with a great number of interfaces like USB, Ethernet, I2C, SPI, RS242, RS485, CAN and many others. We can also find some multimedia interfaces like HDMI, LVDS, VGA and LCD already supported on the Evaluation Board. To follow this tutorial, you can use any USB or Serial modem to connect to the internet.
CHAIRMAN You just have to adapt the interface created at “/dev/” and check the “AT” commands supported and implemented for your modem because each modem has specific AT commands. In this case, we have used for this tutorial a Huawei E173s 3G modem with a compatible SIM Card with data plan activated. Kernel Preparing To use the 3G USB modem through the PPP protocol, it is necessary to select some features in the kernel configurations and then compile the Kernel. To understand how to compile the kernel, I suggest following the link below. http://developer.toradex.com/software-resources/arm-family/linux/board-support-package/build-u-boot-and-linux-kernel-from-source-code
CHAIRMAN Basically, the process to compile the Kernel can be summarized in the following steps: • Toolchain configuration • Download the kernel from the correct repository and branch • Configure the standard processor features • Change the features for your application • Compile
CHAIRMAN When you are configuring the kernel features, go into menuconfig and be sure to enable the following options: CONFIG_PPP: PPP (Point to Point Protocol) is a newer and better SLIP. It serves the same purpose: sending Internet traffic over telephone (and other serial) lines. Ask your access provider if they support it, because otherwise you can't use it; most Internet access providers these days support PPP rather than SLIP. Device Drivers ---> [*] Network device support ---> PPP (point-to-point protocol) support PPP BSD-Compress compression PPP Deflate compression
CHAIRMAN [*] PPP filtering PPP MPPE compression (encryption) [*] PPP multilink support PPP over Ethernet PPP support for async serial ports PPP support for sync tty ports CONFIG_USB_ACM: This driver supports USB modems and ISDN adapters which support the Communication Device Class Abstract Control Model interface. Please read <file:Documentation/usb/acm.txt> for details. Device Drivers ---> [*] USB support ---> USB Modem (CDC ACM) support
CHAIRMAN Necessary Software Packages To configure and connect the 3G modem to the internet, Linux uses, in addition to the kernel drivers, a software which manages the connection. This software is PPP. Usually Toradex images already have the PPP software installed by default. In case you do not have PPP installed, just add the following to your local.conf file for build environments based on Yocto/OpenEmbedded: Testing Communication with the Modem After all the necessary drivers and software are installed, it is possible to check if the module recognizes the 3G modem. The modem interface should appear in /dev. Basically the driver simulates a USB connection as many serial connections.
Execute the following command to search for the interfaces /dev/ttyUSB CHAIRMAN If the files ttyUSB0, ttyUSB1 … e ttyUSB2 were found, the modem was succesfully recognized by the system. In case you want to conduct in-depth testing, it is possible to use a serial terminal like “minicom” to start communicating with the modem and check if it is working well. In my case the modem had a baudrate of 115200.
Configuring the PPP Files After validating the communication with the modem, it is time to create the configuration files responsible for connecting to the internet. You should be able to find a folder inside /etc/ called ppp. Some files need to be created inside this folder. First we create the PPP options file: $ vi /etc/ppp/options _____________________________________ auth crtscts lock hide-password modem mru296
CHAIRMAN mtu 296 lcp-echo-interval 30 lcp-echo-failure 4 noipx persist asyncmap 0xa0000 mru 1500 refuse-chap ipcp-max-failure 30 logfile /home/root/ppp In my case we use the PAP authentication file (may vary depending on Network Provider).
The next step is to create one more file inside /etc/ppp/peer In this file we have configurations for our network provider and the path for the chat file: CHAIRMAN
Now we create the file responsible for sending the AT commands to the modem so it can connect to the internet. This file varies according to modem models/brands. CHAIRMAN
Connecting to the Internet Next we run ppp and analyze the log files. In the log files we can see when each AT command has been executed. CHAIRMAN After running ppp, we open the log file: In my case, I received the following output: tail -f ppp.log Sent 3940 bytes, received 2843 bytes. restoring old default route to eth0 [192.168.10.1] restore default route ioctl(SIOCADDRT): Network is unreachable(101)
CHAIRMAN Script /etc/ppp/ip-down started (pid 778) sent [LCP TermReq id=0x2 "User request"] rcvd [LCP TermAck id=0x2] Connection terminated. Script /etc/ppp/ip-down finished (pid 778), status = 0x0 ATZ OK AT+CGDCONT=1,"IP","zap.vivo.com.br" OK ATDT*99# CONNECT Script chat -v -f /etc/ppp/chat/vivo-3g.chat finished (pid 795), status = 0x0 Serial connection established. using channel 2 Using interface ppp0 Connect: ppp0 /dev/ttyACM0
CHAIRMAN rcvd [LCP ConfReq id=0x1 ] sent [LCP ConfReq id=0x1 ] sent [LCP ConfAck id=0x1 ] rcvd [LCP ConfAck id=0x1 ] sent [LCP EchoReq id=0x0 magic=0xa068db01] sent [PAP AuthReq id=0x1 user="vivo" password=] rcvd [LCP EchoRep id=0x0 magic=0x96baf40f] rcvd [PAP AuthAck id=0x1 ""] PAP authentication succeeded sent [CCP ConfReq id=0x1 ] sent [IPCP ConfReq id=0x1 ] rcvd [LCP ProtRej id=0x2 80 fd 01 01 00 0f 1a 04 78 00 18 04 78 00 15] Protocol-Reject for 'Compression Control Protocol' (0x80fd) received rcvd [IPCP ConfNak id=0x1 ] sent [IPCP ConfReq id=0x2 ] rcvd [IPCP ConfNak id=0x2 ]
CHAIRMAN sent [IPCP ConfReq id=0x3 ] rcvd [IPCP ConfNak id=0x3 ] sent [IPCP ConfReq id=0x4 ] rcvd [IPCP ConfNak id=0x4 ] sent [IPCP ConfReq id=0x5 ] rcvd [IPCP ConfNak id=0x5 ] sent [IPCP ConfReq id=0x6 ] rcvd [IPCP ConfReq id=0x1] sent [IPCP ConfNak id=0x1 ] rcvd [IPCP ConfRej id=0x6 ] sent [IPCP ConfReq id=0x7 ] rcvd [IPCP ConfReq id=0x2 ] sent [IPCP ConfAck id=0x2 ] rcvd [IPCP ConfNak id=0x7 ] sent [IPCP ConfReq id=0x8 ] rcvd [IPCP ConfAck id=0x8 ]
CHAIRMAN local IP address 179.133.47.109 remote IP address 179.133.47.109 primary DNS address 187.100.246.254 secondary DNS address 187.100.246.251 Script /etc/ppp/ip-up started (pid 805) Script /etc/ppp/ip-up finished (pid 805), status = 0x0 As seen in the log file, the chat script is executed step-by-step until we get the following: You can validate the necessary command sequence to get connected using the serial terminal. Once it is validated, you can create your own customized chat script. After checking for an IP address from the network provider, look for whether the ppp0 network interface is active:
Testing the Connection To test if the connection has been successfully established, ping an external ip address: CHAIRMAN To configure DNS, we can use the following command and then ping a URL, for example:
CHAIRMAN Image 1: A running web browser using 3G connection.
CHAIRMAN We can avoid the file being rewritten when system is restarted with the following command: Now it is possible to connect using SSH from an external computer: Configuring a Host Name for our IP Address Another thing we can do is to associate our IP address to a host name. For this purpose, we used the NoIP services (www.noip.com). We then created a free account and added a Host. In our case, we chose toradex.noip.me.
CHAIRMAN Image 2: NoIP Add Host page.
After the Host name is created we can again connect to the module using SSH: CHAIRMAN In our case, when the 3G modem connection is restarted, we always receive a new IP adress. If we try to reconnect to the module, we no longer have access. A workaround was to use a method called Dynamic DNS(Dynamic Domain Name System). NoIP also offers Dynamic DNS services. Further information for using this method can be found here. Basically we send an http request to NoIP with information like IP, hostname, username and password. To accomplish this request, a small Python program was made. It gets executed when we start the 3G modem connection and follows the sequence as listed below:
CHAIRMAN Image 3: Python Application Fluxogram.
CHAIRMAN #!/usr/bin/python import sys import requests import netifaces as ni user = 'xxxxxxx' pswd = 'xxxxxxx' ni.ifaddresses('ppp0') ip = ni.ifaddresses('ppp0')[2][0]['addr'] myhostname = 'toradex.noip.me' payload = {'hostname' : myhostname , 'myip' : ip} r = requests.get("http://dynupdate.no-ip.com/nic/update", params=payload, auth=(user,pswd))
CHAIRMAN print " " if "good" in r.text: print "Hello", user, "!" print "Your IP was successfully updated to:", ip print myhostname, "is up and running!" if "nochg" in r.text: print "Hello", user, "!" print "Your IP", ip, "is still active, no change needed" if "nohost" in r.text: print "The given Host name", myhostname, "does not exist under specified account" print "Please review your Host name and try again" if "badauth" in r.text: print "Login and/or Username incorrect" print "Please correct your credentials and try again" if "911" in r.text:
CHAIRMAN print "Sorry for the incovenience but we are experiencing some problems right now" print "Please try again later" print "noip.com says:", r.text print " " After creating the Python program and making it executable with chmod +x, we can move it to /etc/ppp/ip-up.d/, which is a folder where scripts are executed after ppp connection or create a small script which calls our Python program. Inside /etc/ppp/ we have the files that we created at the beginning of the article as well as other files like ip-down, ip-up, ppp_on_boot. Feel free to explore each one of these files. ip-up is the script which calls another script or program found inside ip-up.d folder. In this case, we created a small script inside ip-up.d
Note: the script is not terminated with .sh Note that all the print commands inside our Python program can be seen in the log file: CHAIRMAN If everything is configured correctly, when we receive a new IP from our network provider, the system automatically updates our host created at NoIP, so it will be possible to connect to the module despite the IP address being changed. Based on all the information provided in this article, it is possible to achieve many other network activities. One of them is to share the 3G modem network with another computer via Ethernet. For this we configured a basic LAN network between two machines and ran the following command:
CHAIRMAN Apart from internet sharing, it is also possible to conduct port forwarding and many other network features. Final Thoughts As seen in this article, a Linux system has many network functionalities. We just need to properly configure them and have access to ppp0 network. Another important point, is that regardless of the used interface, the programming method remains the same. The task of choosing the interface to use is made automatically by Linux depending on the routes. For those who require network connection in their projects and also need system flexibility, the use of Linux in embedded systems is the way to go. References http://metodiew.com/huawei-e173s-and-ubuntu/http://developer.toradex.com/product-selector/colibri-imx6http://developer.toradex.com/product-selector/colibri-evaluation-board