Download
1 / 2
20 likes | 43 Views
Simple step by step instructions to solve Scan To Email Error 2101 on your Kyocera Printer. Get More guideline connect with our tech experts.<br>

E N D
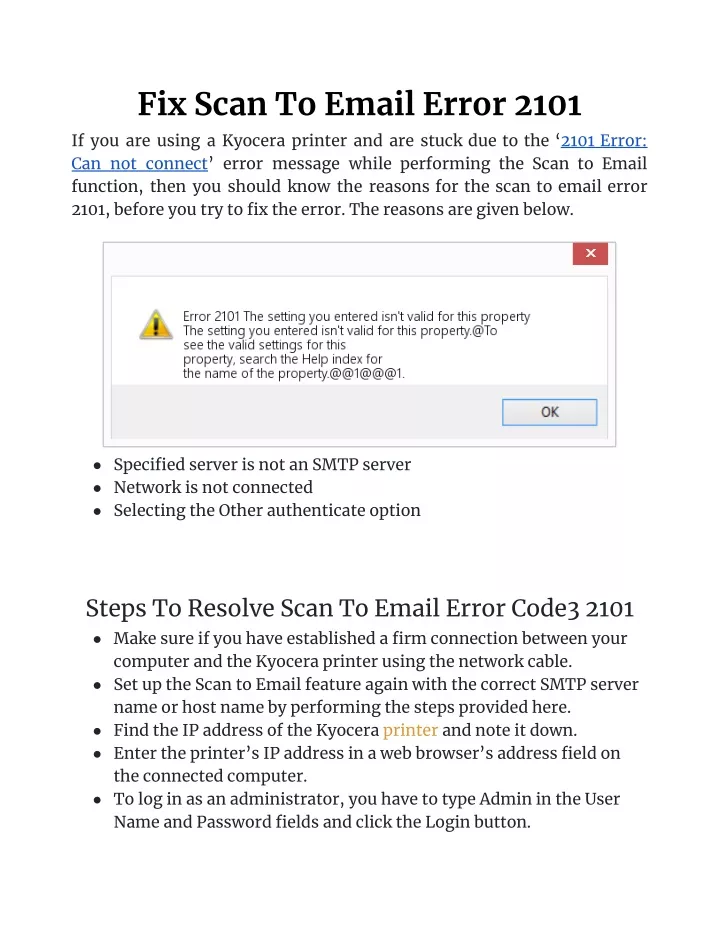
Fix Scan To Email Error 2101 If you are using a Kyocera printer and are stuck due to the ‘2101 Error: Can not connect’ error message while performing the Scan to Email function, then you should know the reasons for the scan to email error 2101, before you try to fix the error. The reasons are given below. ● Specified server is not an SMTP server ● Network is not connected ● Selecting the Other authenticate option Steps To Resolve Scan To Email Error Code3 2101 ● Make sure if you have established a firm connection between your computer and the Kyocera printer using the network cable. ● Set up the Scan to Email feature again with the correct SMTP server name or host name by performing the steps provided here. ● Find the IP address of the Kyocera printer and note it down. ● Enter the printer’s IP address in a web browser’s address field on the connected computer. ● To log in as an administrator, you have to type Admin in the User Name and Password fields and click the Login button.
● Select the Function Settings option followed by the Email option in the left panel. ● In the main panel, navigate to the SMTP Protocol field and click the Protocol link. ● Go to the Send Protocol section, navigate to the SMTP (Email TX) field, and select the radio button next to the On option. ● Choose the SSL/TLS option from the SMTP Security drop-down menu. ● Scroll down and click the Submit option. This will be vital to fix the scan to email error 2101. ● Return to the previous window. ● Fill the SMTP Server Name field with the correct information and type 465 in the SMTP Port Number field. ● Choose the On option from the Authentication Protocol drop-down menu. ● Select POP3 User 1, POP3 User 2, or POP3 User 3 from the Authentication as drop-down menu. ● Fill the Login User Name and Login Password fields correctly. ● Navigate to the Email Send Settings section, fill the Sender Address field with the valid email address, and click the Submit button. ● Now, you will see the ‘Please wait while settings are being applied’ message on the screen. ● Go to the Connection Test field and click the Test button. ● If the Scan to Email setup is correct, you will see the Connection OK message on the screen. ● Click the OK button. ● Try to perform the scan on the Kyocera printer and check if the scan to email error 2101 has been resolved.