Download

1 / 8
80 likes | 215 Views
How to professionally lay tiles using chemical admixtures at home

E N D
How to professionally lay tiles using chemical admixtures at home
A lot of us enjoy carrying out home improvement projects. There are some really simple projects that even the inexperienced can carry out with absolute ease while there are others that require professional help. Here we’ll tell you how to lay a ceramic tile like a professional.
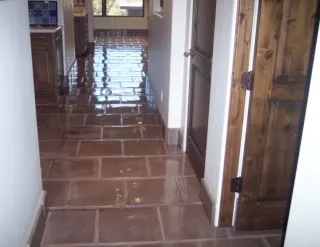
The ceramic tile floors are exceptionally durable. They do the value addition to the home. It is usually a good idea to use ceramic tiles in entryways, kitchens and bathrooms since they are very easy to clean. The first step in this is selecting the right ceramic tile for your house. This is definitely going to be the most difficult part of the entire project. Next you’ll need high quality chemical admixtures, preparation products, and grout as well as tile spacers. You can talk to the store manager who’ll assist you in better selection of products.
Further you’ll need to gather the tools that you’ll require in the process. Some common tools that you’ll need are tape measure, clean bucket, Ceramic tile adhesive spreader, sponge, steel rule, pencil and tile cutter. Now, before you start with the laying of the tile you will have to ensure that the old surface is clean.
Next you can decide your beginning point and mark a perpendicular near it with a chalk. Begin from the entrance and lay a row of tile without the application of any adhesive. Keep it along the chalk line. Make use of spacers in order to keep the distance between the tiles uniform. When you are done covering the entire area like that you are ready to lay the tile. Spread the adhesives on the surface. You’ll now have to work the tile into the adhesive. Add place spacers between these in order to keep the tiles evenly spaced. Once the tile is laid place a level on it. You can use a rubber mallet in order to gently flush them into place. Go on in this manner back and forth all throughout the room. Next you can let the adhesive dry overnight. Following day try and carefully walk on the tile. You’ll now have to cut as well as lay the borders.
Add half an inch spacer against the wall and lay a full tile against the spacer. You can even out the edges of the first tile and mark a line across it using a cutter. Next lay the tile towards the edge of the table or the workbench and snap it off. After the tiles have been laid and the adhesive has been set it is time to move to grouting. This is necessary to fill the spaces between the tiles. You can use a rubber float to apply the material. Ensure that grout has been spread in all empty spaces. Clean off the residue from around the area. After a week has passed brush on a silicone sealer to tighten the grip. Your new ceramic tile floor is ready.
Thank You www.roff.in