Download
1 / 46
460 likes | 849 Views
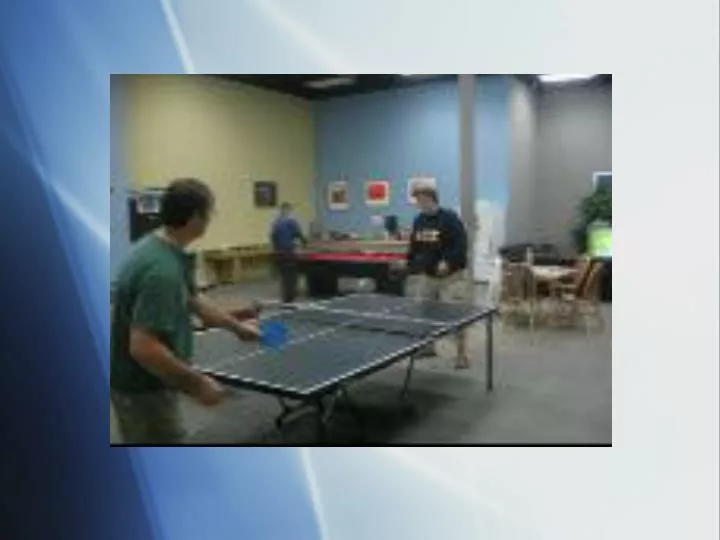
Sprain/Strain of the Thoracic Spine in Ping Pong Accident. Acute care (up to 72 hours). Goals Stop inflammation process Signs Swelling Heat Altered function Redness Pain. RICE Therapy .

E N D
Acute care (up to 72 hours) • Goals • Stop inflammation process • Signs • Swelling • Heat • Altered function • Redness • Pain
RICE Therapy • RestReduce regular exercise or activities of daily living as needed. Your health care provider may advise you to put no weight on an injured area for 48 hours. If you cannot put weight on an ankle or knee, crutches may help. If you use a cane or one crutch for an ankle injury, use it on the uninjured side to help you lean away and relieve weight on the injured ankle. • IceApply an ice pack to the injured area for 20 minutes at a time, 4 to 8 times a day. A cold pack, ice bag, or plastic bag filled with crushed ice and wrapped in a towel can be used. To avoid cold injury and frostbite, do not apply the ice for more than 20 minutes.
RICE Therapy • Compression/ BracingCompression of an injured ankle, knee, or wrist may help reduce swelling. Examples of compression bandages are elastic wraps, special boots, air casts, and splints. Ask your provider for advice on which one to use, and how tight to safely apply the bandage. The application of the brace has been shown to increase joint position sense, it may be suggested that after an acute sprain, initial exercises and ROM should be preformed with some support in an attempt to improve sensory and proprioceptive feedback. Using bracing, prophylactic stabilizer intermittently during functional rehab to provide feedback, compression and support. • ElevationIf possible, keep the injured ankle, knee, elbow, or wrist elevated on a pillow, above the level of the heart, to help decrease swelling.
Treatment Plan • Pain Management Interferential E-Stim, microcurrent, TNS, Neuroprobe acu-point stim. Use analgesics and NSIDS only when necessary and during the acute phase. • Increase Activity As Soon As Possible Document Range of Motion with an inclinometer as soon as possible to chart progress. • Adjust If there is no sign of ligament laxity then the adjustment should be given if the pain can be tolerated and the swelling does not interfere.
Tissue Repair (48 hrs to 6 wks) • Goals • Limit immobilization to decrease compromise in : • Musculotendonous, • Ligament/joint capsule, • Osseous, • Cardiovascular CNS damage • Facilitate healing and decrease scar tissue formation with the proper amount of movement without stressing the injured site.
Tissue Repair • The subacute phase ranges from 72 hours after the initial onset of injury to 90 days after. The sub-acute stage is a crucial period in which the treating physician can ensure rapid recovery. It is also the hardest phase to differentiate, because it does not have the classic physiological signs usually associated with the acute or chronic phases. Most often, the swelling has diminished, the pain has decreased, and the range of motion has slightly increased.
Tissue Repair • Patient compliance becomes an issue because they no longer feel intense pain. Since they do not have excruciating pain, patients may routinely miss follow-up appointments. Pain should not be the indicating factor that a patient has reached maximum medical improvement.
Treatment Plan • Adjust • Correct biomechanics and dysfunction: • Restore soft tissue function: • soft tissue mobilization, stretching, Myofascial release, trigger point, myotherapy, craniosacral technique, strain-counterstrain. • Physical Therapy • Restore muscle function; home exercises: Progression through stage I (mobility and flexibility), stage II (strengthening at obliques, gluteals, multifidus), stage III (closed chain stability strengthening), TheraBand strengthening at thoracic, hip and lumbar extension, and lift-task. • Passive ROM Trunk rotation Flexion/ Extension • Posture awareness and protocol • Using the existing neural pathways and the cerebellum to activate neurological pathways, facilitating proper muscle firing pathways, sensatory integration, in the reduction of future injury prevention.
Remodeling (3 wks – 1 yr) • Goals Maximal Repair Soft tissues Stability ROM Strength Function
Remodeling • Signs/Symptoms Decreased Pain Increased ROM Increased Stability
Treatment Plan • Adjust • Twice a week • Specific Adjustments • Phasing out of care • Rehabilitation • Step 1 – Length • Step 2 – Stretch • Step 3 - Strength
Rehab: Step 1-Length/ROM Rhomboids Latissimus Dorsi Trapezius Posterior Deltoid
Rhomboids • 1. Sit with your feet stretched out in front of you.2. Bend your right knee and place your right foot on the left/outside of your left knee.3. With your right hand, grab and hold on to your right ankle & lean back.4. Holding on to your right ankle, lean back.5. THE KEY: press your right elbow into your right knee and point/push your right shoulder towards the floor in front of you. • http://www.drbackman.com/rhomboid-muscle-stretch.htm
Latissimus Dorsi Position 1 • 1. Place Your Bent Elbow on Door Jam as Pictured.2. Relax And Slowly Lean into the Stretch.3. Hold for 15-20 Seconds if You Are New to this Stretch. • http://www.drbackman.com/triceps-muscle-stretch.htm
Latissimus Dorsi Position 2 • 1. Place Your Bent Elbow on Door Jam as Pictured.2. Relax And Slowly Lean into the Stretch.3. Hold for 15-20 Seconds if You Are New to this Stretch. • http://www.drbackman.com/triceps-muscle-stretch.htm
Trapezius • 1. Sit with your feet stretch out in front of you.2. Bend your left knee and place your left foot on the right of your right knee.3. With your left hand, grab and hold on to your left ankle.4. Holding on tight to your left ankle, LEAN BACK.5. THE KEY: press your left elbow into your left knee. rotate your left shoulder towards the right. point/push your left shoulder up and forward.
Posterior Deltoid • Preparation • Position arm across neck. Place opposite hand on elbow. • Execution • Push elbow toward neck. Hold stretch. Repeat with opposite arm.
Exercise Tubing • Trapezius Exercise- Have patient grab both ends of the exercise tube. Have patient step on middle of tube. Have patient make a shrugging motion. Repeat 10-12 times.
Exercise Tubing • Latissimus Dorsi/ Rhomboid Exercise • 1. In correct posture, stand upright as you hold the exercise tubing. You can attach the exercise tube around a pole, tree, back deck or fence. • 2. Slightly lean back while keeping your abdominal muscles tight, shoulders back and chest up. • 3. Under control, pull the weight down while focusing on bringing your shoulder blades together. • 4. Stop just after your elbow joints are in line with your shoulders and reverse the motion back up. • 5. Under control, reverse the weight back up, stop just before your elbow joints are straight and reverse the motion back down.
Free Weight Exercises • Trapezius Exercise • Shoulder Shrug- Grip a barbell shoulder width apart. Stand upright with your feet shoulder width apart. • Keep your arms straight during the entire movement. Sag your shoulders downward as far as you can. You will feel your traps stretch, hold this position for a second. Shrug your shoulders upward and squeeze your traps at the top. Hold this position for a second. Repeat.
Free Weight Exercises • Posterior Deltoid Exercise • Bent Over Lateral Row-Grab1 or 2 dumbbells. Bend over at the waist with your feet shoulder width apart. Keep a slight bend in the knees to prevent stain on the lower back. Hold the dumbbells at arms length in front of you with the palms of your hands facing each other. Keep a slight bend in your elbows. • Using your upper back strength, slowly raise the dumbbells to the back and upwards in a semicircular arc as far as you can. Hold this position for a second to maximize the peak contraction in the rear deltoids. Lower the dumbbells back to the starting position. Repeat.
Free Weight Exercises • Rhomboid Exercise • Rhomboid strengthening-Lie on your Stomach with the hand of your injured arm in the small of your back at your belt level. Your palm should be facing the ceiling with the back of your hand on your spine. Place a small dumbbell or disc weight in that hand and lift it slowly up toward the ceiling. The elbow stays bent and the palm push up away from the belt approximately 2 to 4 inches. Slowly lower your hand back down to your belt and repeat this exercise 10 times. DO NOT CAUSE PAIN.
Free Weight Exercise • Latissimus Dorsi Exercise • Lat Pull Down- • Sit facing the weight stack with knees bent under the thigh pad and feet flat on the floor. Grasp the bar slightly wider than shoulder-width apart with a pronated grip. Maintain a neutral spine, keep abs contracted and lean back 30° from hips. Retract the scapula and pull the bar toward the chest. Pause, and return to extended position.
Free Weight Exercises • Posterior Deltoid Exercise-Lying on your stomach on a narrow table, drop both arms straight down off the table toward the floor. Grasp a dumbbell weight in each hand and lift them up directly to your sides without bending your elbows. Slowly lower the weights down to your starting position. Repeat for a total of 25 repetitions. • # Repeat the above exercise 25 more times, but this time bend your elbows as you raise your arms to your sides. DO NOT CAUSE PAIN.
The End • The Players Josh “Flanders” Welch, Har “Simran” Khalsa, Erik “Mr. Clean” Van Slooten, Shane “Barry” White, “Handsome” Dave Jennings, Dan “Tripod” Schneider, Brandon “Just Dew It!” Shumaker, and, Danny Sterling “Silver.” Thank You