Download
1 / 12
160 likes | 1.36k Views
Materials. Splinting material, preferably a more rigid material. Note the small and large patterns provided.Bracket and Dil Stick which can be purchased through the Shepherd Apothecary. Please contact James Johnson directly at 404 350-7753 or 404 352-2020.3. One inch webbing and velcro, rivets (dimpled end) big D-ring and reverse curve D-ring.4. Padding (action pad, silicone pads, etc.).

E N D
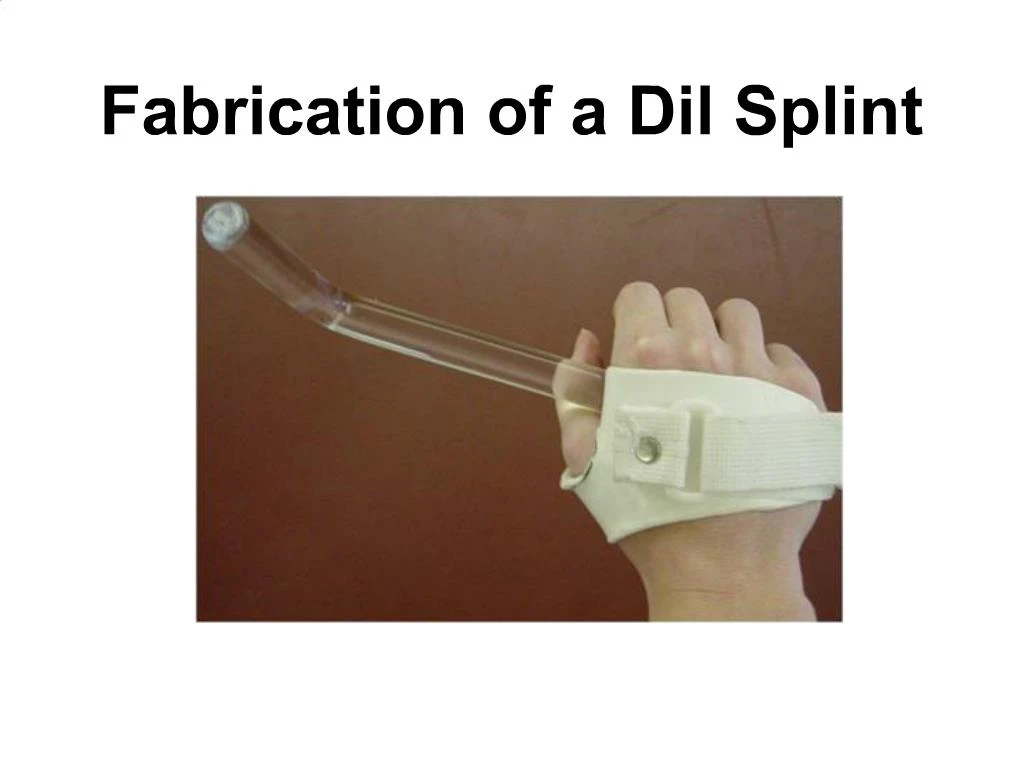
1. Fabrication of a Dil Splint
3. Materials Splinting material, preferably a more rigid material. Note the small and large patterns provided.
Bracket and Dil Stick which can be purchased through the Shepherd Apothecary. Please contact James Johnson directly at 404 350-7753 or 404 352-2020.
3. One inch webbing and velcro, rivets (dimpled end) big D-ring and reverse curve D-ring.
4. Padding (action pad, silicone pads, etc.)
5. Fitting Splint to Hand It is important to capture the palmar arches as this makes the splint be more secure on the hand and cuts down on chaffing /sliding during the bowel program. The thumb post is not heated at this time as it does not get molded until the bracket and dil stick are secured on the splint. The splint should have a arched look when done.
6. Once the splint material has been heated lay the splint right at the web space of the hand and curve the palmar portion around to the palm of the hand. Remember, don�t form the thumb portion right now.
8. Adjusting the Bracket
9. Fabricating and Attaching the Strapping
10. Once you have sewn the hook and loop velcro to the strap and threaded it through the curved D-ring you can now rivet the strap between the splint and bracket.
11. Fitting the Thumb Portion of Splint Now that the strap and bracket have been attacked it is time to insert the dil stick and mold the thumb post. Heat the thumb post and approximately � of the radial/dorsal part of the splint.
12. Strap on the splint and begin to mold the thumb post, bringing the thumb into abduction. This creates more stability during the rotary motions of the bowel program.
13. Padding the Dorsum Hand Padding at the radial/dorsal portion of the splint is helpful as this is the area that has the greatest point of pressure and possible chaffing. Silopads and cut portions of action pads have been helpful.