Download
1 / 52
540 likes | 732 Views
Setting Up a Small Network. Ch 25. Warning. I have added quite a bit to these notes that is not in the chapter Study the notes for the quiz in addition to the chapter. Setting Up a Peer-to-Peer Network (Workgroup). Network Basics. Network Interface Card (NIC) Router or switch

E N D
Warning • I have added quite a bit to these notes that is not in the chapter • Study the notes for the quiz in addition to the chapter
Network Basics Network Interface Card (NIC) Router or switch DHCP server (usually the router) Ethernet cables WAN connection to Internet Computer name Workgroup name (unimportant in Windows 7)
Workgroup • This chapter is discussing a workgroup, not a domain • Recommended for 10 or fewer computers • No domain controller required
Capabilities of a Small Network • Shared storage • Shared printers • Shared internet connection
Network adapters • Each computer needs an adapter (also called a network interface card, or NIC) • Network adapters can be internal (usually installed in a PCI slot) or external (typically connected to a USB port) • Ethernet is the most popular by far • Pic from Network+ Guide to Networks, Second Edition by Tamara Dean
Hubs • A hub or switch can be used to connect the computers in an Ethernet network • To connect two computers, you can use a crossover cable and no hub
Router • You can also use a router or residential gateway, which typically adds network address translation (NAT) capabilities and security features
Wireless Network Access Point • On wireless networks, a wireless access point handles these duties
Cables • On an Ethernet network, eight-wire Category 5 patch cable with RJ-45 connectors on each end • Installing and Configuring Network Adapters • Happens automatically for Plug and Play adapters
Ethernet, Wireless, or Phone Line? • Three popular technologies • Ethernet/Fast Ethernet/Gigabit Ethernet • 10, 100 or 1000 Megabits per second • Wireless • IEEE 802.11b, also known as Wi-Fi -- 11 megabits per second • IEEE 802.11g or 802.1a -- 54 Mbps • IEEE 802.11n (draft) – 300 Mbps claimed
Ethernet, Wireless, or Phone Line? • Phone Line • Uses normal phone lines, no hub or router • Home Phoneline Networking Alliance (HomePNA) -- 10 megabits per second • HomePNA 3 claims 128 megabits per second
Making Connections: Cables and Hubs • Place the hub in a central location • The segment length (distance between furthest points) should not exceed 100 meters (328.1 feet) • All the ports are the same on a hub, except the uplink port • Uplink ports are used to expand a network’s capacity by connecting two hubs • The uplink port achieves the same purpose as a crossover cable
Making Connections: Cables and Hubs • In addition to (or in place of) a hub, your network may use a router, switch, or residential gateway • Often used to share a fast Internet connection • If you plan to use Internet Connection Sharing and you have an external DSL or cable modem, you’ll need to install two network adapters in the computer with the shared Internet connection
Typical Network • The gateway often includes the switch and the wireless access point
Computer Name and Workgroup • Start, right-click Computer, Properties
Understanding Security for Wireless Networks • Risks: • Theft of service • Denial of service • Overwhelming your connection with traffic • Privacy violations • Listening to traffic through your connection • Theft or destruction of data • Entering shared folders • Network takeover • Installing a Trojan to allow remote control of your systems
Wireless Security Options • Wired Equivalent Privacy (WEP) • Old and broken, has mathematical flaws • Hackers can break into a WEP network easily • Wi-Fi Protected Access (WPA) • Much safer than WEP • Uses a pre-shared key from 8 to 63 bytes long • Wi-Fi Protected Access 2 (WPA2) • Strongest protection
Open Wi-Fi Network • If you just buy Wi-Fi devices and turn them on, you get an "open" network • Completely insecure • Anyone nearby can use it • Convenient, but risky
Security at the Wi-Fi Access Point • Change the administrator password to a non-default value • Use a non-default network name (SSID) • Disable remote administration • Upgrade the firmware • Restrict access to computers with known MAC addresses • Use virtual private networks for wireless connections
RADIUS • On larger networks with one or more domain servers available • Set up a Remote Authentication Dial-In User Service (RADIUS) server • This allows the most secure option of all: 802 1x authentication • In addition, consider enabling Internet Protocol Security (IPsec)
Connecting to a Hidden Network • Some wireless networks don’t broadcast their SSID • This does not make your network more secure, because the SSID is still sent in the data packets and hackers can easily capture it • You can still connect, by entering the SSID manually (see pages 468-469 in the textbook)
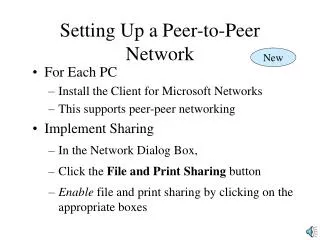
Sharing an Internet Connection • To share an Internet connection safely on a small network, you have two options: • Install a router or residential gateway • The simplest and most secure method • Use Internet Connection Sharing (ICS) • Uses a Windows computer as a router • Rarely done for wired connections these days, routers are cheap and more efficient
Virtual Router • Allows clients to share a Windows 7's wired connection through the wireless card • This is a popular idea, there are several products and pages about how to do it • Links Ch 25a, 25c
Network and Sharing Center • Map (at top) • View your active networks • Change your networking settings • Tasks (on left)
Viewing Network Computers and Devices • Start, Network
Viewing Network Computers and Devices • Details View • Media Devices include Windows 7 computers sharing media
Network Map • Uses "Link Layer Topology Discovery" protocol
Viewing Network Status • In "Network and Sharing Center", in the "View your active networks" section, click a link on the right side (usually named "Local Area Connection" )
Viewing Network Status Details • Click "Details" button
Customizing Your Network • In "Network and Sharing Center", in the "View your active networks" section: • Click icon to change network name or icon • Click blue "Home Network" or "Work Network" to change network location
Managing Network Connections • In "Network and Sharing Center", click "Change Adapter Settings"
Network Connection Properties • Right-click a connection, Properties • Notice IPv6 and LLTD • LLTD Mapper draws the map • LLTP Responder sends data to the mapper • You can disable these items by clearing the check mark
IP Settings • In "Local Area Connection Properties", double-click "Internet Protocol Version 4 (TCP/IPv4)"
Network Connection Components • Client For Microsoft Networks • Allows you to connect to Windows computers • QoS Packet Scheduler • Quality Of Service – will be important when we switch to Internet Protocol version 6 (IPv6) • File And Printer Sharing For Microsoft Networks • Allows your computer to be a file or print server
Network Connection Components • Internet Protocol Version 6 (TCP/IPv6) • The new Internet protocol, not widely used in the USA yet • Internet Protocol Version 4 (TCP/IPv4) • The primary Internet protocol in current use
Network Connection Components • Link-Layer Topology Discovery Mapper I/O Driver • Used to create the network map • Link-Layer Topology Discovery Responder • Also used to create the network map
IP Addresses • On a TCP/IPv4 network, every computer has a unique IP address • Four 8-bit numbers • (In decimal format, a number between 0 and 255) • Separated by periods • Example: 147.144.1.2 • TCP/IP configuration has three additional settings: • Subnet Mask • Default Gateway • DNS Server
Subnet Mask, Default Gateway, DNS Server • Subnet mask • Tells the network how to distinguish between IP addresses that are part of the same network and those that belong to other networks. • Default Gateway • A computer that can send packets outside the local network • Domain Name System (DNS) Servers • Computers that translate domain names (such as www.microsoft.com) into IP addresses
Methods For Assigning IP Addresses • Dynamic Host Configuration Protocol (DHCP) • The most common method • IP configuration is set automatically by the server • Automatic Private IP Addressing (APIPA) • If DHCP fails, the machines make up their own addresses starting with 169.254.
Methods For Assigning IP Addresses • Static IP Addressing • Administrator must manually type in the IP address for each machine • Servers typically use static IP addresses • Requires more administrative effort and not commonly used for workstations anymore
Methods For Assigning IP Addresses • Alternate IP Configuration • You set the address used if DHCP fails • Useful for a laptop that travels between two different LANs • Start, Network • Click "Network and Sharing Center" • Click "Manage Network Connections" • Right-click a connection, Properties • Click "Internet Protocol Version 4 (TCP/IPv4)", Properties
Sleep Mode • A sleeping computer uses very little power, just enough to maintain data in RAM • But to wake it, you normally need to use the keyboard, mouse, or power button
Using a Network Connection to Wake a Sleeping Computer • In "Network Connection Properties", click Configure
Disabling Password Requirement on Wakeup • Start, type in WAKE, click "Require a password when the computer wakes" • Convenient but insecure
Generating the Magic Packet • Link Ch 25b