Download

1 / 35
360 likes | 696 Views
Creating a Web Page With EBSCO Page Composer. updated April 2006. Sheila Benedum, Bay Village Linda Ehrnschwender, LEECA. What is Page Composer?. Page Composer is a tool within the EBSCO host database that allows you to make Web pages for assignments, reading lists, etc.

E N D
Creating a Web Page WithEBSCO Page Composer updated April 2006 Sheila Benedum, Bay Village Linda Ehrnschwender, LEECA
What is Page Composer? • Page Composer is a tool within the EBSCOhost database that allows you to make Web pages for assignments, reading lists, etc. • You can add links to articles from EBSCOhost, searches and other Web sites. • You can also add images, colored backgrounds and adjustable fonts.
Before you start… • Have an objective for your page. • Decide the layout of your page. • Search for Web sites and images first. Save them on a disk or your computer. • Have two browser windows open, one for Page Composer and one for searching.
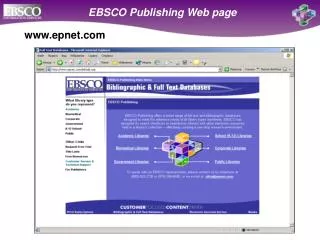
Open the EBSCOhost entry screen. Select Middle, Secondary or Professional Search…or any of the databases from All EBSCO Databases. Accessing Page Composer
To create a new account, click here. If you have an account, log in here.
Complete “Create a New Account” to set up a username and password.
Click on “Page Composer” to begin a new Web page. If you want to continue or edit an existing page, just click on “Edit Web Page” under the title. All your pages will be saved here.
Begin Creating! Enter a name for your page and click “Continue.”
Add text boxes. Click on “Text” to add a text box. Start with your title. You can select a font, size, color, etc. for each text box.
Choose a background. Click on “Background” to see options. Click the radio button of your background selection.
Choose to fill the entire background or just the border around your page. Click on “Add to Web Page” to make it an Element of your page.
Click on “Folder Item” to add your saved articles. Check the articles you want to have appear on your Web page. Click on “Add to Web Page.” Add Articles.
Add Images. Click on “Image.” Type a caption. Copy/paste the file name or the URL of your image. Click “Add to Web Page.”
If you are copying an image from a Web site: Right click on the image. Choose Properties. Copy URL. Paste into Page Composer in 2 places. Image Tip! This will give credit to the source!!
Click on Search Box. Type the text you want to display above search box. Click “Add to Web Page.” Add a Search Box.
Click on Web Link. Type in text to display for the Web site. Copy/paste the URL. Click on “Add to Web Page.” Add Web Sites.
Page Divisions You can add a horizontal line if you wish to divide your page. Format size, color and alignment. Click on “Add to Web Page.”
Preview Preview your page anytime by clicking the Preview button.
Edit your page.(Scroll down to see page elements.) Click the Edit button in front of section you wish to change. Move elements up or down on the page by clicking the Move button. Delete elements by clicking the delete button.
Save your page. Click “Download.”
Click on the name of the page to save the page elements, including the background and graphics.
E-mail Click on the E-mail icon.
Type in the e-mail addresses you wish. Put a semicolon between addresses. Add the subject of your e-mail.
Sharing your page • Your page will be saved on EBSCOhost’s server for your convenience in editing. • You will need to have your page mounted on your school’s Web site to be accessed by students.
www.infohio.org Available Help Resources