Download
1 / 52
570 likes | 1.87k Views
Open Source Web Map Development with OpenLayers. OpenLayers. What is this About?. This talk is about OpenLayers, an API that allows you to easily create powerful web maps Geared towards beginners / intermediate users

E N D
What is this About? • This talk is about OpenLayers, an API that allows you to easily create powerful web maps • Geared towards beginners / intermediate users • I’ll try to cover all the major parts of the OpenLayers library, but this will serve mainly as an introduction • Feel free to ask for clarification or questions at any time • Slides and code can be found at my site • vasir.net
What is OpenLayers? • Open source, client side Javascript library for making interactive web maps • Cross browser (even IE6 support) • No special server side software required, unless you want to use your own map server • Originally developed by Metacarta as a response, in part, to Google Maps • Current version is 2.10
How Does it Work? • Anatomy of a web map • Client sends requests, server returns map tiles
Where Does OpenLayers Fit In? • OpenLayers is the client side part of the client-server model • The map server can be nearly anything • WMS, WFS, Google Maps, Bing, ESRI, Yahoo, TileServer, OpenStreets Map, etc. • OpenLayers sends requests to the map server to get the right map tiles when you navigate around the map
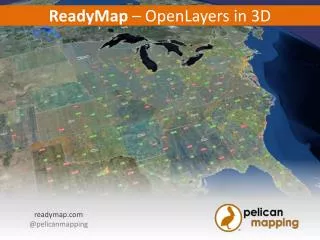
Who Uses OpenLayers? • EveryBlock • Tracks neighborhood events • WhiteHouse • http://www.whitehouse.gov/change • Me • At FREAC (Florida Resources and Environmental Analysis Center) with iMapInvasives to track invasive species
FREAC – Tracking Invasive Species • Using a vector layer and clustering to group invasive species observations
Getting OpenLayers • Download at http://openlayers.org • After downloading, copy over the img and theme folders, along with OpenLayers.js to your map page’s directory • Example
Making a Map with OpenLayers • Basic process for making a map • 1. Create a map object and a div the map will go in • 2. Create a layer object and add it to the map object you created • 3. Create control objects and add them to the map object • 4. Zoom the map to some location • In this example, we’ll zoom to the map’s max extent
Our First Map • Let's make a map using a WMS service provided by MetaCarta <!DOCTYPE html> <html lang='en'> <head> <meta charset='utf-8' /> <script type='text/javascript' src='OpenLayers.js'></script> <script type='text/javascript'> var map; function init() { map = new OpenLayers.Map('map_element', {}); var wms_layer = new OpenLayers.Layer.WMS( 'OpenLayers WMS', 'http://labs.metacarta.com/wms/vmap0', {layers: 'basic'}, {} ); map.addLayer(wms_layer); map.zoomToMaxExtent(); } </script> </head> <body onload='init();'> <div id='map_element' style='width: 500px; height: 500px;'></div> </body> </html>
The Map • We should see
Dissecting the Code • We first need to include the OpenLayers library • <script type='text/javascript' src='OpenLayers.js'></script> • The code works basically like this • Create an HTML <div> to hold the map • Create a global variable called map so we can access it outside the init() function • Create an init() function that will create the map • Call the init() function
Dissecting the Code – Step 1 • Step 1 said to create a map object and div • HTML Div: • <div id='map_element' style='width: 500px; height: 500px;'></div> • Javascript: • map = new OpenLayers.Map('map_element', {});
Dissecting the Code – Step 2 • Step 2 was to create a layer object and add it to the map • The first parameter is the layer's name, which will show up in things like the layer switcher control • The second parameter, the first { }'s, specify the parameters to send to the WMS server • The third parameter, the second { }'s is an optional options object with OpenLayer's layer specific setting (like opacity) var wms_layer = new OpenLayers.Layer.WMS( 'OpenLayers WMS', 'http://vmap0.tiles.osgeo.org/wms/vmap0', {layers: 'basic'}, {} ); map.addLayer(wms_layer);
Dissecting the Code – Step 3 • Step 3 said to create control objects • We didn't create any, so default controls will be used • ArgParser • Will parse arguments (if they exist) and zoom the map to passed in positions (used with permalinks) • Attribution • Allows us to add attributions (text) to the map for each layer • Navigation • Allows mouse dragging • PanZoom • The pan zoom bar on the left side
Dissecting the Code – Step 4 • Step 4 was to zoom to some extent • Here, we do it the standard way • First, we check to see if the map's center has already been set (via the argparser control if coordinates were passed in) • If it's not set, we zoom to the map's max extent if(!map.getCenter()){ map.zoomToMaxExtent(); }
How it Works • OpenLayers uses Object Oriented Programming (OOP) • OpenLayers is divided into many classes • Example: the Layer class, the Map class, etc. • To use the library, we basically create objects from the classes OpenLayers provides
OOP • So, to really do things, we need to create objects which we'll interact with • For example, in OpenLayers: • Every map needs a map object created from the OpenLayers.Mapclass • To create objects in Javascript we do • use the new keyword • specify the class we want to create the object from • specify any parameters to pass into the class
Creating an Object • We’ve done this with • map = new OpenLayers.Map('map_element', {}); • Here we’re creating an object called map from the OpenLayers.Map class • Notice how we use the new keyword, then specify the class name OpenLayers.Map • We also pass into two parameters • The ID of the div we want the map to go in • An optional options object which specifies any additional settings we want the object to have
The Options Object • The options object is called an anonymous object or object hash. • This means, essentially, it is an object that is not created from a class • In Javascript, an anonymous object is compromised of key:value pairs separated by commas. For example • var dummy_object_hash = { ‘answer’ : 42, 'question': undefined }; • Why? • Openlayers uses anonymous objects frequently to specify settings when create objects
The Map Class • OpenLayers' Map class is what drives our maps • Control and Layer objects belong to a map object • Creating control objects or layer objects alone will not get us very far. These objects must be hooked up to a map if we want them to do anything. • So, we need a map object to actually make a map
Create a Map Object • Let’s practice creating a map object from the Map class • We’ll use some custom settings using an anonymous object • Let's limit the map's extent to -180, -90, 0, 0 map = new OpenLayers.Map('map_element', { maxExtent: new OpenLayers.Bounds(-180,-90,0,0) });
More on the Options Object • In the previous example, maxExtent was our key and a OpenLayers.Bounds object was our value • The list of possible keys and values to use for options objects for all classes can be found in the OpenLayers docs • http://dev.openlayers.org/docs/files/OpenLayers/Map-js.html
Overriding Map Controls • By default, all maps get four control objects • Let's override that by setting the controls property in the options object • How do we know what to set the value as? The docs tell us • {Array(OpenLayers.Control)} List of controls associated with the map. • So, we'll need to pass in an array of control object • If we pass in an empty array, the map gets no controls. Useful, for instance, if we want to show a static map for printing map = new OpenLayers.Map('map_element', { maxExtent: new OpenLayers.Bounds(-180,-90,0,0), controls: [] });
The Layer Class • OpenLayers, as the name implies, allows multiple layers in a map • We can use WMS layers, OpenStreet Map, Google Maps, Bing, Yahoo, static images, the list goes on • All layers have an optional options anonymous object ( {key:value} pairs ) which specify OpenLayers specific things, like opacity • Let's make a little mashup with Google and WMS
Google + WMS Map • First we need to link to the Google Maps API • We'll use v3 of the Google Maps API. To link to it: • Next, we'll set the map's projection to 'EPSG:900913' and set the map's maxExtent • Projection created by 900913 (Google) <script src='http://maps.google.com/maps/api/js?sensor=false'></script> map = new OpenLayers.Map('map_element', { projection: new OpenLayers.Projection('EPSG:900913'), //set the bounds. This roughly translates to -180, -90, 180, 90 maxExtent: new OpenLayers.Bounds(-20037508, -20037508, 20037508, 20037508) });
Projections • OpenLayers default projection is EPSG:4326 • It also supports EPSG:900913, which is the projection used by third party APIs • Google, Bing, Yahoo, ESRI, etc • We can do transformations between projections • Out of the box, only transformations between 4326 and 900913 work, but we can use Proj4js to support nearly any projection • http://proj4js.org/ • http://spatialreference.org/ • Contains definitions for a ton of projections, can drop in to openlayers after including the Proj4js library
Google + WMS Map Con't. • Now, we create our Goolge layer • And then our WMS layer • The WMS layer will attempt to use the map's projection, EPSG:900913, so be sure your WMS server supports it var google_layer = new OpenLayers.Layer.Google( 'My Google Layer', {} ); var wms_layer = new OpenLayers.Layer.WMS( 'OpenLayers WMS', 'http://vmap0.tiles.osgeo.org/wms/vmap0', {layers: 'basic'}, {opacity:.7, isBaseLayer: false} );
Result • Finally, we can call map.addLayers and pass in an array of layers to add to the map • Last time, we passed in a single layer with map.addLayer map.addLayers([google_layer, wms_layer]);
Control Class • The Control class lets us make our maps interactive • No controls, no map interaction • One of the most basic controls, as we've seen, is the Navigation control • Allows panning / zooming, added by default • Tons of additional controls • Very easy to create your own
Control Class Con't. • Let's add some controls to our map now • The basic format is • var my_control = new OpenLayers.Control.CONTROL_NAME( {} ); • map.addControl(my_control); • The { } is an optional options object that controls control specific settings • Possible keys and values change per control
Add Some Controls • Let's add some controls • There are a few different ways to add them • e.g., addControl or addControls //Create a control object then add it to the map var layer_switcher = new OpenLayers.Control.LayerSwitcher({}); map.addControl(layer_switcher); //Add some controls on the fly map.addControls([ new OpenLayers.Control.ScaleLine({}), new OpenLayers.Control.MousePosition({}) ]);
Result • We'll see something like this • It's hard to see the scaleLine and mousePosition controls though
Styling Controls • We can style any control with CSS • We can either modify the theme's CSS file • Or include an external CSS file • Or write the CSS inline • To keep things simple, we'll just do it inline • We'll need to include the !important keyword to make sure our CSS overrides the default theme's style • Styled via classnames, typically in the form of olControlCONTROLNAME
Some style • We'll add this inside the <head> tag <style> .olControlMousePosition { background: rgba(220,220,220, .8) !important; color: #336699 !important; font-size:1.2em !important; padding:0 0 1em 0 !important; } .olControlScaleLine { bottom:75px !important; font-family: 'Arial', sans-serif !important; font-weight: bold !important; position:absolute !important; right: 0 !important; } </style>
Result • And we'll see something kind of ugly
Using Vectors • We can use the Vector Layer class to create a vector layer • Rendered with either SVG, Canvas, or VML • You can choose which one, SVG by default • Vector layers contain Features, which are basically the objects in the vector layer • Points, polygons, lines, etc. • Let's add a Vector layer and a EditingToolbar control which lets us place features (vector objects) on the map
Vector Layer • Create a vector layer and editingToolbar control • Must pass in vector layer object to the control //Add a vector layer var vector_layer = new OpenLayers.Layer.Vector( 'Vector Layer', {}); //add it to the map map.addLayer(vector_layer); //add an editing toolbar to the map map.addControl(new OpenLayers.Control.EditingToolbar(vector_layer));
Result • Add some features
Adding Features + Style • We can load in features from KML, GML, GeoJSON, and other formats • We can also dynamically create them • Make sure you use coordinates in the right projection • Let's create some features with random points • We'll call transform on the point coordinates to turn them from EPSG:4326 (lon / lat) to EPSG:900913
Add Them • The code //Create some points for(var i=19; i>=0; i--){ //call the addFeatures method of the vector layer object vector_layer.addFeatures([ //An openlayers feature.vector object new OpenLayers.Feature.Vector( new OpenLayers.Geometry.Point( (Math.floor(Math.random() * 180) - 90), (Math.floor(Math.random() * 180) - 90) ).transform(new OpenLayers.Projection('EPSG:4326'), new OpenLayers.Projection('EPSG:900913')) //transform takes in two projection objects // the first is the source projection, second is the target )]); }
Styling Vectors • To style a vector layer, we'll use a StyleMap object which maps Style objects to 'renderer intents' • A render intent is basically a 'state' of the map • Possible values are 'default', 'select', 'temporary', 'delete' • Process is to: • 1. Create a style object • 2. Create a style map object, use key: value to apply intent: style object • 3. Add style map object to vector layer
Style Map code • Style object contains a symbolizer • A symbolizer is basically just an anonymous object, { key:value } pairs • Similar to CSS var vector_style = new OpenLayers.Style({ cursor: 'pointer', fillColor: '#aaee77', fillOpacity: .8, pointRadius: 8 strokeColor: '#669933', strokeDashstyle: 'solid', strokeWidth: 4 }); var vector_style_map = new OpenLayers.StyleMap({ 'default': vector_style }); //Add the style map to the vector layer vector_layer.styleMap = vector_style_map;
Attribute Replacement • We can also use attribute replacement • Looks at a feature's properties and applies values to the style object • Uses the syntax '${attribute_name}' • The attribute_name is a property inside the feature's attribute object
Attribute Replacement • First we'll add a property to the OpenLayers.Feature.Vector objects we generate • Next, we just use the replacement syntax in our vector_style object new OpenLayers.Geometry.Point( (Math.floor(Math.random() * 180) - 90), (Math.floor(Math.random() * 180) - 90) ).transform(new OpenLayers.Projection('EPSG:4326'), new OpenLayers.Projection('EPSG:900913')), { //Properties each feature will get point_size: (Math.floor(Math.random() * 30)) } pointRadius: '${point_size}',
What Else • We can load in data from WFS servers, static KML / GeoJSON files • We can also use Rules and Filters to get even more fine grain control over how our features are styled • We can use Strategies to affect the way features behave (e.g. clustering, like in the screen shot at the beginning)
What Else Con't. • Tons more we can do – load in images from Flickr, for instance