Download
1 / 53
530 likes | 768 Views
An Internet Browser is computer software used to browse (view) the World Wide ... CNAP is accessible through a common Web browser (IE 6.0 preferred) ...

E N D
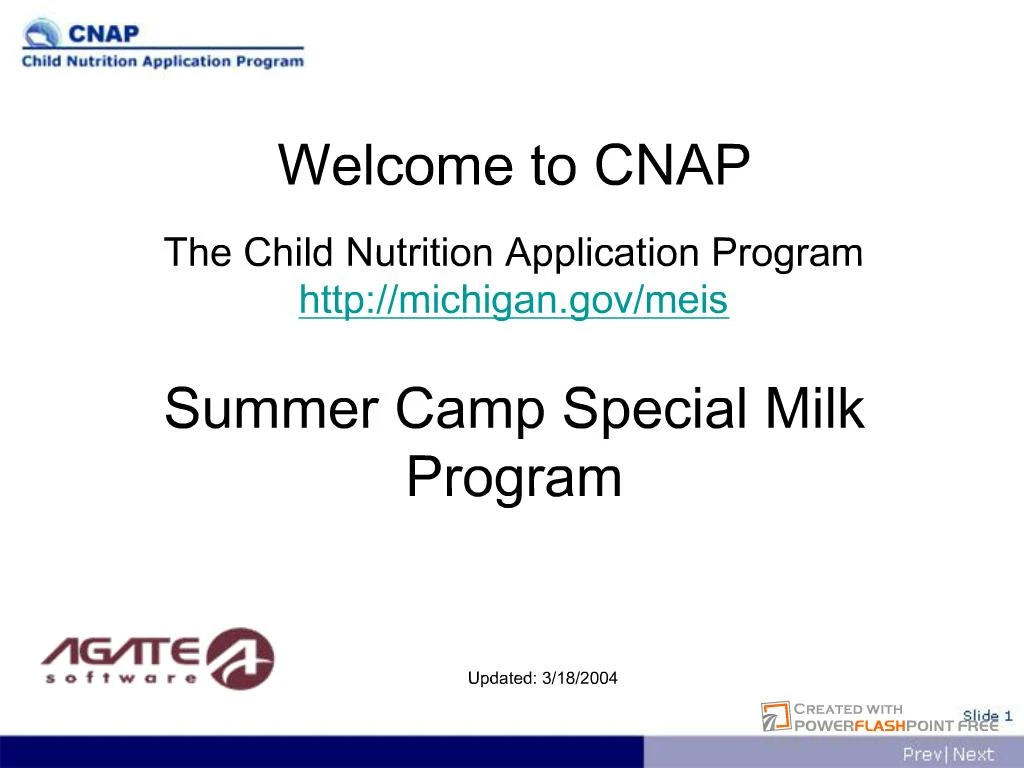
Slide 1:Welcome to CNAP The Child Nutrition Application Program http://michigan.gov/meis Summer Camp Special Milk Program
Updated: 3/18/2004 Welcome to CNAP, the online application program for all Child Nutrition programs. This guide will walk you through the application process for the Summer Camp Special Milk Program.Welcome to CNAP, the online application program for all Child Nutrition programs. This guide will walk you through the application process for the Summer Camp Special Milk Program.
Slide 2:This manual will answer:
What is CNAP What is needed to use CNAP How to access CNAP How to complete the Summer Camp Special Milk Program application How to make modifications and amendments to your application
Slide 3:The Child Nutrition Application Program (CNAP) CNAP allows for: Applying online Error checking during entry Online review and comments on applications Amendments online Previous years� application information saved and brought forward Up-to-date view of the applications Automated generation of email
What is CNAP? CNAP is the online application program for all Child Nutrition programs. These include: National School Lunch Program (NSLP), Child and Adult Care Food Program (CACFP), Summer Food Service Program (SFSP) and the Summer Camp Special Milk Program (SCSM). CNAP is the online application program for all Child Nutrition programs. These include: National School Lunch Program (NSLP), Child and Adult Care Food Program (CACFP), Summer Food Service Program (SFSP) and the Summer Camp Special Milk Program (SCSM).
Slide 4:CNAP Benefits
Reduce paperwork for applicants and MDE Save time in future years, since most prior year data will be available Process your application more efficiently
Slide 5:What is needed for CNAP?
A Computer with an Internet Connection Web Browser -Internet Explorer 5.5+(6.0 preferred) or Netscape 4.0+ JavaScript and Session Cookies enabled for the Web Browser Adobe Acrobat 4.0+ A Valid MEIS Account
Slide 6:What is an Internet Browser and which ones can be used?
An Internet Browser is computer software used to browse (view) the World Wide Web. CNAP supports Internet Explorer 5.5 or Netscape versions 4.0 or higher. You can check the version number by clicking �Help� and then by clicking �About Internet Explorer� or �About Netscape�. If the version you have is below 4.0, you can download the latest version by going to: http://www.microsoft.com/windows/ie/default.asp http://home.netscape.com/download/ Browsers are free software. Preferred: IE 6.0+ An Internet Browser is a piece of computer software used to browse (view) the World Wide Web. The two most common browsers are Internet Explorer and Netscape. They are free and can usually be found on most computers. The preferred browser is Internet Explorer 6.0+ The CNAP application supports IE or Netscape versions 4.0 or higher. You can check the version number by clicking �Help� and then by clicking �About Internet Explorer� or �About Netscape�. If the version you have is below 4.0 then you can download the latest version by going to http://www.microsoft.com/windows/ie/default.asp http://home.netscape.com/download/ Browsers are free software.An Internet Browser is a piece of computer software used to browse (view) the World Wide Web. The two most common browsers are Internet Explorer and Netscape. They are free and can usually be found on most computers. The preferred browser is Internet Explorer 6.0+ The CNAP application supports IE or Netscape versions 4.0 or higher. You can check the version number by clicking �Help� and then by clicking �About Internet Explorer� or �About Netscape�. If the version you have is below 4.0 then you can download the latest version by going to http://www.microsoft.com/windows/ie/default.asp http://home.netscape.com/download/ Browsers are free software.
Slide 7:What is JavaScript ?
JavaScript is a programming language that is used on Websites to increase functionality. In CNAP, JavaScript is used for a variety of features including the automatic correction of user-entered data. Internet Explorer Click "Tools" Click "Internet Options" Click the "Security" tab Click "Custom Level" Under "Scripting", "Active Scripting", Click "Enable" If the CNAP system detects that JavaScript is disabled for the browser, CNAP will show this list of steps.
Slide 8:What is JavaScript? (continued)
JavaScript is also used in CNAP to do tasks such as open new windows, provide a menu system, and supply user-friendly error messages. Netscape Click "Edit" Click "Preferences" Click "Advanced" Click "Enable JavaScript" If the CNAP system detects that JavaScript is disabled for the browser, CNAP will show this list of steps.
Slide 9:What are Session Cookies?
Cookies are either files or pieces of information temporarily stored in computer memory that are used to record information. CNAP uses session cookies. To use session cookies: Internet Explorer Click "Tools" Click "Internet Options Click the "Security" tab Click "Custom Level" Under "Allow per-session cookies (not stored)" Click "Enable" Cookies are either files or pieces of information temporarily stored in computer memory that are used to record information. CNAP uses what are called session cookies (temporarily stored in computer memory) in order to maintain information about your connection. Internet Explorer Click "Tools" Click "Internet Options Click the "Security" tab Click "Custom Level" Under "Allow per-session cookies (not stored)" Click "Enable" Cookies are either files or pieces of information temporarily stored in computer memory that are used to record information. CNAP uses what are called session cookies (temporarily stored in computer memory) in order to maintain information about your connection. Internet Explorer Click "Tools" Click "Internet Options Click the "Security" tab Click "Custom Level" Under "Allow per-session cookies (not stored)" Click "Enable"
Slide 10:What are Session Cookies? (continued)
Although some in the Internet community are concerned about the abuse of Disk Cookies which are often used for marketing purposes, the Session Cookies used by CNAP do not warrant any sort of concern. No sensitive data is stored within these Cookies, and once you logoff CNAP or close your browser each Session Cookie is automatically removed. Netscape Click "Edit" Click "Preferences" Click "Advanced" Under "Cookies" Click "Accept all Cookies"
Slide 11:What is Adobe Acrobat Reader and do I need it?
Adobe Acrobat Reader is a software program that is used to view PDF files. PDF stands for �Portable Document Format�. Regular Web pages which are programmed in HTML (Hypertext markup language) do not always look good when printed. The PDF format was designed for the Web to look consistent each time it is printed. CNAP uses PDFs for those things that must be printed. In some cases PDFs are dynamically generated using data entered by users. Once Acrobat Reader is installed, all files in CNAP with the extension .pdf will be opened with the Acrobat Reader Program. Adobe Acrobat Reader is free software, and can be downloaded from http://www.adobe.com/products/acrobat/readstep2.html CNAP supports Adobe Acrobat and Adobe Acrobat Reader versions 4.0+
What is MEIS and how can an account be obtained? MEIS is the Michigan Education Information System. MEIS provides one system for the management of user accounts for a variety of MDE applications (computer programs). In order to use CNAP you must obtain a free MEIS account. This can be done by going to the following Website Address and clicking Create a MEIS Account: http://michigan.gov/meis Click on the link to the MEIS User Management System.Slide 13:DO NOT create a new MEIS Account if you already have one! You may already have a MEIS account for these programs: CNAP-School Meals Program CNAP-CACFP Claim for Reimbursement (SM-4012-SL) Claim for Reimbursement (SM-4013-C) The MEIS account is used for many different programs within MDE. DO NOT create a new MEIS account if you already have one.The MEIS account is used for many different programs within MDE. DO NOT create a new MEIS account if you already have one.
Slide 14:-
If you already have a MEIS account, enter your existing MEIS account number on the Summer Camp Special Milk Security Access Form.
If you need to create a MEIS Account, follow these four steps. Click Create a MEIS Account and enter the first and last name of the user account to be created.Slide 16:Create a MEIS Account � Step 2
Click the Proceed to Step 2 button and add the basic biographical information. - Email address must be a valid and working address - Phone 1 should be the school or office/agency phone number - Phone 2 can be left blank - Address 1 is the school or agency address - Address 2 is PO Box (leave blank if no PO Box) - Disregard ISD, District and Building Codes � these do not need to be filled out Email address must be a valid and working address. Phone 1 should be the school or office/agency phone number. Phone 2 can be left blank. Address 1 is the school or agency address. Address 2 is PO box or left blank if no PO Box. Disregard ISD Code, District Code, Building Code � these do not need to be filled out. Email address must be a valid and working address. Phone 1 should be the school or office/agency phone number. Phone 2 can be left blank. Address 1 is the school or agency address. Address 2 is PO box or left blank if no PO Box. Disregard ISD Code, District Code, Building Code � these do not need to be filled out.
Create a MEIS Account Step 3 Complete the security Information used for getting password help. You will choose the 3 questions & answers � DO NOT use the Q & A listed as examples for your Q & A�s. Make up questions that are unique to you and provide answers that you will easily remember.Slide 17:You will choose the three questions and answers � DO NOT use the Q & A listed as examples for your Q & A�s. Make up questions that are unique to you and provide answers that you will easily remember.You will choose the three questions and answers � DO NOT use the Q & A listed as examples for your Q & A�s. Make up questions that are unique to you and provide answers that you will easily remember.
Create a MEIS Account Step 4 Verify the account information you have provided and click the Create New MEIS Account button. Confirming your MEIS Account The final screen will confirm your account. Print this page for your records. Hint: Change your password immediately. Warning: Passwords are case-sensitive Your MEIS account will be able to access CNAP once you have been entered in the system. For help with MEIS MDE/CEPI Help Desk (517) 335-0505Slide 19:Print this page!!!! Keep a copy of this page in a safe place. If you forget your Login and Password, you must contact the help desk at: 517/335-0505.Print this page!!!! Keep a copy of this page in a safe place. If you forget your Login and Password, you must contact the help desk at: 517/335-0505.
Slide 20:Now that you have your MEIS account . . . .
You are ready to begin CNAP
Slide 21:Quick facts about CNAP
Users must have access to a working Internet connection. CNAP can be accessed from multiple machines. CNAP does not impose any hardware requirements on its users. CNAP is accessible through a common Web browser (IE 6.0 preferred). CNAP is located at http://michigan.gov/meis Internet connection Modem (telephone lines) will be sufficient DSL or cable modems are faster The faster the connection, the easier it is to use CNAP
CNAP�s first screen provides: Basic information about the CNAP system Links to further Program Information CNAP Access Information Information on Registering for Main. Boxes to enter your MEIS login name and password. How do I access CNAP? To gain access to CNAP, you must first submit the appropriate CNAP Security Forms. NOTE: The Summer Camp Special Milk Security Access Form is included as an enclosure with this mailing. Click the CNAP Access Information link to access the CNAP Security Web page. The CNAP Access Information page will direct you to download, print, complete and mail the appropriate security forms to gain access to CNAP.Slide 24:CNAP Authorization Structure
MEIS accounts are required for all levels. Level 3 - Enter/Certify Can Enter/Edit information and Certify applications Can initiate applications Can assign lower security levels (levels 1 and 2) to allow other users to edit or view Submit, modify and delete applications and amendments Level 2 - Enter/Edit Can Enter/Edit information on application pages Can initiate applications Level 1 - Read-Only Can View all parts of the application Cannot input or edit any information To add Level 1 (Read-Only) or Level 2 (Enter/Edit) access rights within your organization, the person with Level 3 (Enter/Certify) submission rights for the Summer Camp Special Milk Program application on CNAP must add the users. Remember - each user must complete, submit and have a Security Access Form for each application (program) they will have access to on MEIS. To add Level 1 (Read-Only) or Level 2 (Enter/Edit) access rights within your organization, the person with Level 3 (Enter/Certify) submission rights for the Summer Camp Special Milk Program application on CNAP must add the users. Remember - each user must complete, submit and have a Security Access Form for each application (program) they will have access to on MEIS.
Logging In to CNAP Once your Security Form has been submitted and approved, you can use your MEIS Login and Password to log in to CNAP. Remember, the MEIS password is Case Sensitive. To Login to CNAP: Enter your MEIS Login and Password in the text boxes on the CNAP Login page Click the Login button If you receive an error message, contact the authorized Level 3 (Enter/Certify) user within your sponsor organization. If one is not assigned or you are the Level 3 (Enter/Certify), contact Ruby Dixon (517)373-0420 and mention CNAP Summer Camp Special Milk Security Access.Slide 26:Avoid the �Back� and �Forward� buttons
CNAP is a dynamic, database driven Web application. Content in CNAP changes according to information that is entered into the system. When applicants enter important information into the system, it changes the way they see certain parts of the application; therefore, it is highly recommended that users use the navigation provided within the application. Using the browser�s Back and Forward buttons to return to a page is not the same as clicking a link to go to that same page. The Back button will simply load the cached (or saved) version of the page that exists on the local hard drive as it was the last time the page was accessed. By using the Back button the user is not getting the latest information from the website but rather an �older� saved version of the page. Session Cookies, which CNAP relies on to function properly, may be unavailable or incorrect. Avoid the �Back� and �Forward� button in order to always see the latest information available.
Slide 27:Home
From Home, you can: Start an application for a new year Choose an application to work on View Users for Your Agency View Your Personal Profile
Slide 28:Starting a New Application
From HOME Select a Program/Fiscal Year from the drop down list. After selecting the application click the Apply button. Review the information presented about your selection, and verify by clicking the Apply button to start your application for the new year. Data from the prior year is copied or brought forward: this year, some Sponsor/Site Information; next year, most data. You will then be directed to the Main Menu for your new application.
Slide 29:CNAP-Summer Camps Walkthrough
Main Menu Application Agreement Materials Sponsor/Site Information Program Forms Downloadable Documents Downloadable Required Prototypes Other Forms And Information Attachments Administrative Options
Slide 30:Header Details
Home � Allows the user to return to the page with all initiated applications by the user�s district/agency. Main Menu � This link will return the user to the list of documents for the current application. Help � This link will take the user to specific help information for each page. This feature is the first line of defense for question or problems that users might encounter. Errors � This page will track the progress of the application and alert the user when any critical part is not completed. All errors must be addressed in order to submit the application. View Comments � Use this to view processor comments. Logout � This link will log the user out of the application. Application and User Information - Information on which application is currently being worked, the application�s current status, fiscal year of the application, and the current user�s name, the Applicant Sponsor, and the Agreement Number.
Slide 31:Application Agreement Materials (Read This First)
Read these documents first
Slide 32:Sponsor/Site Information
Sponsor Information Site Listing
Slide 33:Sponsor Information
Enter the Sponsor Information on this page You must check at least one operating month in question number 6 You must supply a contact person in question number 7 When all data has been entered, click the Save button
Slide 34:Site Listing
On the Site Listing page, you can: Add and Review your Sites Activate and Inactivate Sites This page lists the Sponsor and all Sites which are participating, or have participated, in the application If a new site is added, the word NEW will appear in front of the site name. Click the hyperlinked name of the Sponsor to view or edit the Sponsor Information page Click the hyperlinked name of a Site to view or edit the Site Information page To search for a particular site, click the Search button 25 sites will display on this page at a time If you have more than 25 sites, select a range from the dropdown and click Go to additional sites
Slide 35:Adding a Site
To Add a Site: Click the Add a Site button on the Site Listing page A site number will automatically be assigned You will be directed to the Site Information page
Slide 36:Site Information
Complete the Site Information page for each Site: Enter Site Information Enter data for each camp session When all data has been entered, click the Save button
Slide 37:Editing a Site
Click the hyperlinked Site Name on the Site Listing page to access its Site Information page. To inactivate a site, remove the checkmark from the Active column for the site When a site is inactive, data for the site is not required elsewhere in the application, and the site is not included when the application is certified When done editing, click the Save button
Slide 38:Downloadable Required Documents (Print, Complete, Sign and Mail to MDE)
You will see forms applicable to your program. Download items in this list by clicking the hyperlink. A new window will open from which you can print or save the document. If a document is required to be attached (uploaded or mailed), indicate in the Attachments section on the Main Menu.
Slide 39:Downloadable Prototypes
Downloadable Prototypes are required to be submitted to MDE if changes to the forms provided are made. Documents in this section include: None as of now
Slide 40:Other Forms and Information
Slide 41:Attachments
Upload or Mail files using this utility Items in this list will change depending upon selections made on the Sponsor and Site Information pages, and in Program Forms. Your application may not be approved until all required items have been received. Items which may appear in this list include: Notification of Tax Exempt Status of the Sponsor under Section 501(c)(3) of the I.R.S code of 1986
Slide 42:Attachments (continued)
To Upload or Mail Files: Click the Upload/Mail link to the right of the document you wish to upload or mail You will be directed to the Upload/Mail Attachments page To Upload a File, select the checkbox titled Upload Document Click the Browse button and locate the file on your computer in the popup dialog Click the Open button on the popup dialog (the dialog will close) Click the Save button on the Upload/Mail Attachments page To Confirm Mailing a Document, select the checkbox titled Mail Document Click the Save button on the Upload/Mail Attachments page
Slide 43:Administrative Options
Slide 44:Administrative Options
Adding Users to an Application MDE must add Level 3 Enter/Certify users. Your Level 3 (Application Administrator) can enter additional users: Level 2 Enter/Edit Level 1 Read Only To Add a User: Enter the user�s MEIS Account Number in the textbox under the Add Users to Application section Select the new user�s Security Level (Level 1 or Level 2) Optional: You may specify dates for the new user to become active (gain access to CNAP), and inactive (no longer be able to access CNAP) Click the Save button The new user will now be able to log in and access this application
Slide 45: Administrative Options (continued)
Request a PDF (hard copy) of this Application Select Generate PDF to have the system generate a PDF of your application. This generation takes place over night and an email will be sent to you once it is ready to be downloaded. (Make sure your email address is correct in MEIS) Select View PDF to view, print or save a PDF of the complete application The PDF will be filled in with the information entered in the Sponsor/Site Information Print and maintain a copy of the final application for your records
Slide 46:Footer Details
Home � Allows the user to return to the page with all initiated applications by the user�s district/agency. Main Menu � This link will return the user to the list of documents for the current application. Help � This link will take the user to specific help information for each page. This feature is the first line of defense for question or problems that users might encounter. Errors � This page will track the progress of the application and alert the user when any critical part is not completed. All errors must be addressed in order to submit the application. View Comments � Use this to view processor comments. Logout � This link will log the user out of the application.
Slide 47:Application Errors
Errors on the current page will be displayed at the top of a Sponsor Information, Site Information or Program Form page after it is saved. Access the Errors page by clicking the Errors hyperlink in the menu bar from any page within a CNAP application. This page displays all errors in the Application. Errors displayed on this page must be corrected before the application can be submitted. To access and correct a specific error, click the hyperlinked name of the page on which the error occurs. After an error is corrected and the Program Form is saved, the error will no longer appear on the Errors page.
Slide 48:Submission of the Application
To Submit an Application: To do this, click the Submit Application button on the Application Menu. Only an Enter/Certify user can submit an application. If there are any errors, a page will prompt the necessary corrections. After all errors are corrected, return to the Main Menu and click the Submit Application. The next page will present conditions that must be agreed upon when submitting the application. After reading and agreeing with conditions, click the I Agree button to continue. The user will see a confirmation page. Please print this page to keep as a record of the submission of the application.
Slide 49:Application Status Levels
Application Status Levels - To keep track of applications within the CNAP system a status level is applied to the application at every step. There are two distinct status categories, Applicant side and Processor side. The Applicant side status levels are given to the application if the applicant must perform actions such as addition or deletion of data. The Processor side status levels allow for the MDE Processors to view the data, comment on the application and then approve and certify the Sponsor. Processor/Certifier Status Levels Pending Review Review In Progress Approved, Pending Certification Approved and Certified
Slide 50:Modifications Process
Modifying the Application If MDE finds your application requires modification: The status of the application will be set to �Returned for Modifications� An email will be sent to you. The Modify Application button will show next to the application on the Home page. Level 3s (Enter/Certify) and Level 2s (Enter/Edit) can click Modify Application to begin updating the application, which changes the status to Modifications in Progress. Click �View Comments� to see MDE�s comments. Level 3s and Level 2s can make changes. Enter/Certify users can submit the modified application by clicking the Submit Modifications button on the Main Menu.
Slide 51: Checklist: View Comments
Processor Checklist After submission of the application in the CNAP system, the application will be reviewed by MDE Processors. During the review process, MDE Processors make comments in checklists. These external comments can be viewed by the applicant. Once comments are entered in the checklist, a link in the CNAP header will appear called View Comments. Click the View Comments link in the menu bar to view your Processor�s comments.
Amendment ProcessSlide 52:Amending the Application Once an application is Approved and Certified, an Amend Application button shows next to the application on the Home page. Enter/Certify users can click Amend Application to begin an amendment, which changes the status to Amendment in Progress. Level 3s and Level 2s can make changes. Enter/Certify users can submit the amended application by clicking the Submit Application button on the Main Menu. CNAP will ask for a brief narrative to explain why the amendment is needed.
Slide 53:Questions?
Email any questions to: MDE-CNAP-campmilk@michigan.gov