Download
1 / 28
280 likes | 285 Views
In this blog, we will discuss how you can install WordPress on your VPS server. You can accomplish this using cPanel, automatic installation, or using CWP.

E N D
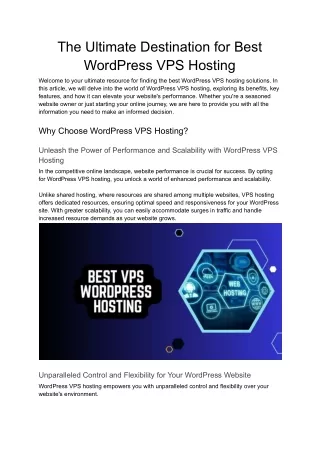
How To Install WordPress On VPS Hosting About 30.3% of the top 1000 websites online are WordPress powered. These statistics speak volumes about the popularity and preference for WordPress. Not only this, WordPress websites rank higher on Google. You will be surprised to know that WordPress takes care of 80-90% of Google’s crawling issues. If you choose to install WordPress on your VPS hosting server, it can be a little challenging but not impossible. In this blog, we will discuss how you can install WordPress on your VPS server. You can accomplish this using cPanel, automatic installation, or using CWP. Let’s get into it straight away. Also Read: A Complete Guide To Managed WordPress Hosting HOW TO INSTALL WORDPRESS ON VPS MANUALLY USING CPANEL. STEP 1 – DOWNLOAD WORDPRESS. It’s quite a simple and straightforward process. Begin by downloading the latest version of WordPress on their official website.
Also Read: VPS Hosting VS. Dedicated Hosting – 6 Key Factors To Consider. STEP 2 – UPLOAD WORDPRESS TO VPS. You need to upload the zip file, which has the contents required to install WordPress. Access your cPanel account to start the installation process. Bear in mind that you need to set up your cPanel if you have recently purchased the plan. Alternatively, you can even upload these files using programs like CyberDuck, WinSCP, Bitkinex, etc.
In my opinion, the cPanel file manager tool is the best, but you can use whatever suits you best. cPanel is excellent for people who are not familiar with FTP applications or can’t access them. Log in to your cPanel account and click on the file manager option. Now, proceed to the public_html directory and click on the same.
If you are doing this for the first time, you will have to create a website folder. Ignore this step if you have already created a folder. Now, click on the +Folder option.
Name the folder and open it. Click on the upload option. Now, click on the option called – Select file & upload the zip file you downloaded
initially. After the zip file is fully uploaded, click on the link at the bottom, which says – Go back to “home/newhostitsmart” (just an illustration). It will redirect you to the file directory. When you reach the previous page, click reload, and it will show you the zip file you uploaded. Choose the zip file and click on the Extract option.
Now, a popup will appear on your screen asking you to confirm the extract location. Be very careful when you choose the extract location. Once you have selected the proper location, click on the extract file option. Your file directory will now have WordPress. At this point, it is safe to delete the zip file from the directory. Also Read: 22 Best Plugins For WordPress In 2022
STEP 3 – MOVE WORDPRESS FILES TO THE ROOT DIRECTORY. Congratulations, you have all the WordPress files in possession, but the mission is far from over. You need to move them to the correct location. Access the WordPress folder and select all the files inside. Using the move option, move all the files into the public_html directory.
Click on the move files option only after you have selected the correct location.
STEP 4 – CREATE A FRESH DATABASE. Have patience, my friend. We are almost at the end; it is time to create a fresh database. Go to cPanel and click on the MySQL Database Wizard option. It is mandatory to name the database. Choose a name like WP2021 or something like that because you need to remember it to complete the steps that come later. Once you name the database, click on the button – Next step.
Now, create a username and password for the database. After you complete these steps, click on the create user button. The next step is to choose the privileges you want for the account. To do this, click on the option – All privileges followed by the button – Next step.
Awesome, you have successfully created the database. Important note – Jot down the database name, username, and password because you will need them to connect WordPress to the database. Also Read: WordPress.Com Vs WordPress.Org – What’s The Difference? STEP 5 – EDIT THE WP-CONFIG- SAMPLE.PHP FILE. All the hard work you have put in to create a database is of no use if WordPress cannot use it. To make it possible for WordPress to use the database, you need to edit the wp-config-sample.php file.
How do you edit the wp-config-sample.php file? Access the public_html directory and select the wp-config-sample.php file. Now, right-click on the file and choose the edit option. Suddenly, you will see a popup on your screen that provides options like download, view, edit, move and copy. To continue, click on the edit button. Inside the same file, you need to find and replace three specific lines to ensure that it connects with the database you created. First, locate – define( ‘DB_NAME’, ‘database_name_here’ ); Then, replace database_name_here with the name of your database. Locate – define( ‘DB_USER’, ‘username_here’ ); Now, replace username_here with the username you created. Finally, locate – define( ‘DB_PASSWORD’, ‘password_here’ );
Replace password_here with the password you created. After locating and replacing everything, it brings us to the last hurdle. Copy and paste a fresh set of Salt keys from the WordPress API. Access the Salt Key Generator and copy all the contents. Next, replace the salt key lines in the wp-config-sample.php file with the contents you copied from the Salt Key Generator and save the changes. At last, you have to close the file. Post configuration, it is not a sample anymore. Hence, you need to rename it to wp-config.php. STEP 6 – INSTALL WORDPRESS You can pat yourself on the back. After putting in all the hard work, all you need to do is visit your website and install WordPress. Visit yourwebsite.com/wp-admin/install.php to do the needful. Now, you know how to install WordPress on the VPS server manually. Also Read: Using WordPress For Your Next Website Project? Understanding Its Pros And Cons! HOW TO INSTALL WORDPRESS ON VPS THROUGH CPANEL (AUTOMATIC PROCESS) Before opting for the automatic process, we need to keep in mind that we require the three things below. 1. A domain name. For example – www.mydomainmychoice.com
2. 3. A web hosting account that supports cPanel, PHP, and MySQL cPanel username and password. Also Read: EVERYTHING YOU NEED TO KNOW ABOUT CPANEL – BEGINNER’S GUIDE STEP 1 – LOG ON TO YOUR CPANEL ACCOUNT. If your domain name is www.mydomainmychoice.com, that’s associated with your hosting account, then log in to your browser and type www.mydomainmychoice.com/cPanel Now, pull out the details of your username and password that you received when you signed up with your hosting provider. Enter those details as shown below.
STEP 2 – LOCATE SOFTACULOUS APPS INSTALLER. Once you log in, you will see the cPanel dashboard. Find a text box that says – Find the functions by typing here. Type Softaculous in the box, and under Softaculous apps installer, you will find a host of scripts that it supports. WordPress would be one of them. Click on it and proceed. STEP 3 – CHOOSE A PROTOCOL AND A DOMAIN NAME. After you click on the WordPress icon, it will lead you to a new screen. The new screen will display details of the WordPress version you are about to install on your website. Proceed to click on the install button. A new page will appear in front of you, which will guide you through the software installation.
Select your desired protocol. You can choose http://www. Or https://www, but understand that you can only use https://www if you have an SSL certificate for your domain. Then you can choose your domain. You will come across a textbox labeled – In Directory. Leave it blank unless you want to install WordPress under a separate sub-folder. STEP 4 – FILL OUT DETAILS OF YOUR WORDPRESS WEBSITE. Below is an example of the website settings.
Now, enter your website’s name and also include a brief description. Choose an admin user name, password, and email address. You will require these credentials to into your WordPress admin account, so note down these details carefully. Think of a strong password to ensure the safety of your WordPress account. Now, select the language of your choice and proceed further. STEP 5 – CHOOSE PLUGINS AND A THEME. If you want to install some plugins, an option will appear in front of your screen. It is not mandatory to do so, but you can choose your desired theme if you would like to.
Don’t forget to enter your email address when prompted. A textbox saying – “Email installation details to” will appear in front of you; remember to enter your email details there. Now, click on the install button. The Softaculous installer will verify all the details that you submitted and install WordPress on your website. Upon successful verification and installation, you will receive a confirmation on your registered email address. The message will be something like Congratulations; we have successfully installed WordPress on your website. WordPress has been successfully installed on – www.mydomainmychoice.com Administrative URL – www.mydomainmychoice.com/wp-admin/ NOTE – Softaculous is simply an automatic software installer, and you won’t receive any support for individual software packages. For
further assistance, you need to contact the respective software provider’s website. STEP 6 – ASSESS THE PERFORMANCE OF THE INSTALLATION. Type your administrative URL – www.mydomainmychoice.com/wp- admin/ and log into your WordPress website. Congratulations, your installation process is now complete. Your WordPress dashboard will display numerous customization options, including theme changes, shortcut to creating blog posts, adding pages, enabling comments, and much more. You can install WordPress on your website using cPanel quite easily. As seen above, there is no need to download the source code or painstakingly create a database step by step. Softaculous will do it all for you. The dashboard will give you an impressive overview of your website; you can personalize it to your liking and start uploading content. HOW TO INSTALL WORDPRESS ON VPS THROUGH CWP (AUTOMATIC) Owing to WordPress’s immense popularity, you might want to install it on your VPS server, especially when using CWP. Let’s discuss how to install WordPress on your CentOS Web Panel.
Key Requirements 1. CWP installed & configured. 2. CWP user-created 3. Desired domain DNS records set up in Cloud DNS Manager or CWP. 4. You can also configure CWP. STEPS TO INSTALL WORDPRESS THROUGH CWP. (AUTOMATIC) Log on to the CWP’s user admin panel. Proceed to the Add ons section, you will see the WordPress icon. Click on the same to begin the installation process. Meanwhile, we will also select the protocol, domain, and root directory for the WordPress installation. Focus on the content in the directory box because a tiny mistake can cause serious repercussions.
Now, click install. Go to List Accounts and navigate to the WordPress website. Then, open USER DIR. You will see a screen that provides options to select the language for your website.
The next step is to fill out the website information and administrator login information.
Now, click on the install button, and if everything goes smoothly, you will get this message – Success! WordPress has been installed. Thank you and enjoy. Now that you have successfully installed WordPress, all you need to do is log in and manage your website.
HOW TO INSTALL WORDPRESS ON CWP. (MANUAL) Let’s go through the steps to install WordPress on CWP. (a manual process) 1. Open the CWP panel and create a new account. 2. Create a MySQL database. First of all, find SQL services, choose MySQL manager and then click on – Create database and user. 3. Obtain SSH access to servers and run the below-mentioned commands. CD /home/USERNAME/public_html wget http://wordpress.org/latest.tar.gz tar xvzf latest. Tar. Gz mv WordPress/*. rm -rf WordPress chown -R USERNAME: USERNAME * Post WordPress installation, visit the domain name in any browser & configure it. Choose your language
4.2 – Insert database details created during step 2. 4.3 – Fill out all the required information & click on the button – Install WordPress.
4.4 – Post-installation, log in to the WordPress admin section.
VPS Hosting Offer Have a giant website? Sign up with our VPS hosting solution that fits your budget & goals Explore Source - https://www.hostitsmart.com/blog/how- to-install-wordpress-on-vps-hosting/