Download
1 / 77
780 likes | 1.79k Views
Unbolt and remove oil pan and pump. Inspect pan for debris to help ... The rear main oil seal can be replaced without removing the engine if it is a ...

E N D
Slide 2:Engine Removal, Disassembly, and Cleaning
Chapter 20
Slide 3:Objectives
Use a vehicle identification number (VIN). List engine repairs that require engine removal. List engine repairs that do not require engine removal.
Slide 4:Objectives
Summarize the steps in preparing for engine removal. Describe how to keep wires, lines, and parts organized during engine removal and teardown. Summarize how to attach and use engine lifting devices.
Slide 5:Objectives
Explain the major steps for engine disassembly. Describe the methods used to clean engine parts.
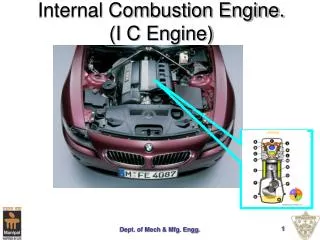
Slide 6:Engine Identification
Identify basic engine characteristics Number of cylinders Cylinder arrangement Injection type Longitudinally or transversely mounted Accessories present Turbocharger or supercharger present
Slide 7:Engine Identification (Cont.)
Vehicle identification number (VIN) contains codes for Engine type and size Transmission or differential type Body style Optional equipment Other specific features
Slide 8:Engine Identification (Cont.)
Casting numbers can be found on major components, such as block, camshaft, and heads Numbers can be used for ordering parts Books and charts are available to decode casting numbers Part measurement is another way to find out about engine
Slide 9:Is Engine Removal Necessary?
Whether engine must be removed depends greatly on access Access varies with year, make, and model of vehicle If unsure if engine must be removed, refer to service information
Slide 10:Repairs Possible with Engine in Place
Valve job Valve seal and valve spring replacement Oil pump replacement Rod and main bearing replacement (Renault)
Slide 11:Repairs Possible with Engine in Place (Cont.)
Rear main oil seal replacement Piston service External engine part service (General Motors)
Slide 12:Repairs That Require Engine Removal
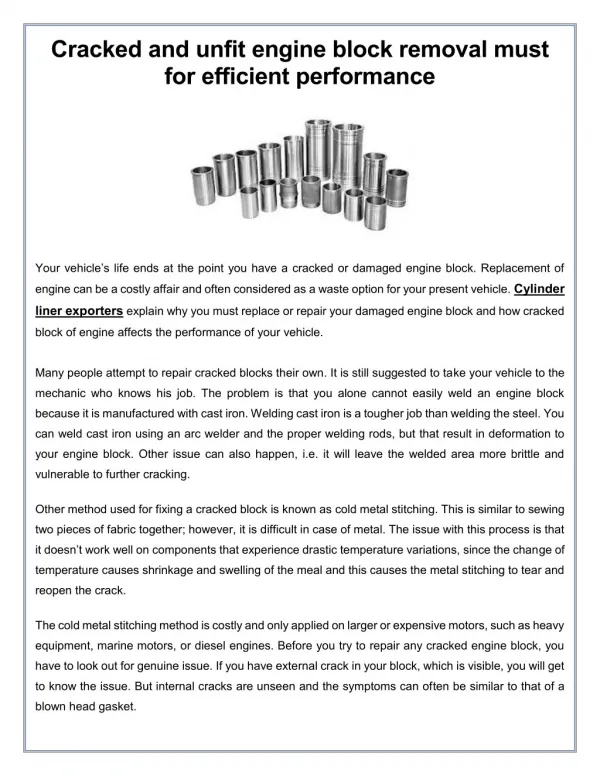
Crankshaft service When wear or damage is excessive, engine must be removed If only crankshaft needs repair, however, it is not necessary to remove other engine components Cylinder repair
Slide 13:Engine Overhaul
Engine overhaul, or engine rebuild, usually includes Complete disassembly of engine Cleaning, inspecting, and measuring parts Replacement or service of worn or damaged parts Reassembly of engine
Slide 14:Parts Replaced or Reconditioned
Piston rings and worn or damaged pistons Connecting rod, main, and camshaft bearings Oil pump Timing belt, chain, or gears Core plugs Camshafts and worn lifters Valve train components Valve guides and seats All gaskets and seals Other parts not within specifications
Slide 15:In-Vehicle Engine Overhaul
In-vehicle engine overhaul can be done if Cylinder and crankshaft wear are within specifications Oil pan and heads can be easily removed with engine installed
Slide 16:Preparing for Engine Removal
Disconnect components under engine Disconnect starter and drain fluids Disconnect everything on top of engine that prevents removal (Acura)
Slide 17:Preparing for Engine Removal (Cont.)
Mark fasteners and connections before removal. Keep fasteners organized in several different containers (Honda)
Slide 18:Removing the Transmission or Transaxle
Some front-wheel drive vehicles require that engine and transaxle be removed as single unit Check service information If transmission or transaxle is to be removed, drain fluid
Slide 19:Removing the Transmission or Transaxle (Cont.)
On rear-wheel-drive vehicles, other parts must be removed Drive shaft Transmission and clutch linkage Speedometer cable Rear motor mount On transaxle, axle shafts must be disconnected
Slide 20:Checks before Removing Engine
All hidden wires or ground straps are removed All bell housing bolts are removed Torque converter bolts are removed All fuel lines are disconnected and plugged Motor mounts are unbolted Floor jack or holding bar is supporting transmission
Slide 21:Installing Lifting Fixture or Chain
Position lifting fixture or chain at recommended lifting points and bolt in place
Slide 22:Installing Lifting Fixture or Chain (Cont.)
Position fixture or chain so it raises engine in level manner Follow manufacturer instructions
Slide 23:Lifting Engine Out of Vehicle
Make sure crane boom or engine hoist is centered over engine Attach crane or hoist to lifting fixture or chain Place floor jack under transmission, if needed Raise engine slowly 1-2 inches
Slide 24:Lifting Engine Out of Vehicle (Cont.)
Check that everything is disconnected Continue slowly raising engine while pulling away from transmission Roll engine straight out and away from vehicle Lower engine to ground or mount it on engine stand
Slide 25:Separating Engine from Transmission/Transaxle
Rest assembly on shop floor Block engine so that it does not flip over Remove all parts preventing transmission/transaxle removal Remove transmission or transaxle Inspect flywheel for problems
Slide 26:Placing Engine on Engine Stand
Engine stand usually has removable, rotating fixture to which engine bolts Usually easier to bolt engine to fixture before fixture is attached to stand Typically four adjustable arms on fixture
Slide 27:Placing Engine on Engine Stand (Cont.)
Slide 28:Engine Disassembly
Once engine is bolted to stand, teardown can begin Teardown methods vary somewhat from engine to engine General procedures are similar and apply to all engines
Slide 29:Engine Front End Disassembly
Disassemble engine front end first Remove all parts in front of engine front cover Remove vibration damper Remove front oil seal (if specified in manual) Unbolt and remove engine front cover Remove oil slinger and timing mechanism Remove and inspect components in front cover
Slide 30:Engine Top End Disassembly
Disassemble engine top end next Valve train Cylinder head Related components
Slide 31:Engine Top End Disassembly (Cont.)
(Ford)
Slide 32:Engine Top End Disassembly (Cont.)
(General Motors)
Slide 33:Engine Top End Disassembly (Cont.)
(Ford, Honda)
Slide 34:Cylinder Head Disassembly
Disassembly procedures for cylinder heads vary Especially between overhead valve and camshaft engines Always refer to service information for correct procedure
Slide 35:Cylinder Head Disassembly (Cont.)
Rules for cylinder head teardown Inspect for signs of trouble before disassembly Remove valve keepers, retainers, and springs Before removing valves, check tips for mushrooming Remove other parts that prevent head service Keep all parts organized
Slide 36:Engine Bottom End Disassembly
Inspect cylinders for excess wear Use ridge reamer to cut away ridge Use compressed air to blow metal shavings out of cylinder
Slide 37:Engine Bottom End Disassembly (Cont.)
Unbolt and remove oil pan and pump Inspect pan for debris to help diagnose problems (Ford)
Slide 38:Engine Bottom End Disassembly (Cont.)
Unbolt one connecting rod cap Use wooden hammer handle or rod to tap piston and rod out of cylinder Replace rod cap
Slide 39:Engine Bottom End Disassembly (Cont.)
Check piston and connecting rod and cap for identification marks If not marked, use number punch set to mark rods and body caps
Slide 40:Engine Bottom End Disassembly (Cont.)
Follow same procedure to remove other pistons and rod assemblies Remove all old piston rings from pistons Mark main bearing caps if necessary Remove main cap bolts and caps
Slide 41:Engine Bottom End Disassembly (Cont.)
Lift crankshaft carefully from block Remove balance shaft Pry out core plugs from head and block Remove all external hardware (Ford)
Slide 42:Cleaning Engine Parts
After parts are removed from block and cylinder heads, everything should be cleaned Different cleaning techniques are needed depending on part construction and type of material
Slide 43:Scrape Off Old Gaskets and Hard Deposits
Scrape off All old gasket material Hard deposits As much sludge and carbon as possible (Fel-Pro)
Slide 44:Power Cleaning Tools
Scuff pad Cuts through and lifts off gasket material and silicone Too soft to damage metal surfaces easily Power brush and wire wheel Remove hard carbon deposits
Slide 45:Cleaning Solvents
Various chemical cleaners or solvents are used to remove hard-to-reach or stubborn deposits Spray-on gasket solvent can soften gasket material Let chemical work for few minutes Scrape off softened material with scraper
Slide 46:Cold Tank
Cold cleaning tank Will not remove hard carbon or mineral deposits Decarbonizing cleaner Can remove carbon, paint, gum, and most other deposits
Slide 47:CAUTION
Wear a cartridge respirator, rubber gloves, and a rubber or plastic apron when using a cold solvent tank. Part cleaning solvents can be harmful if absorbed into your skin, inhaled, or ignited.
Slide 48:Hot Tank
Hot tank is used to remove Mineral deposits Hard carbon deposits Oil Grease Paint
Slide 49:CAUTION
Before hot tanking, all non-metal parts must be removed to avoid damage. These parts should be cleaned by hand in cold solvent tank.
Slide 50:Heat Cleaning Ovens
Machine shops may use heat cleaning oven instead of hot tank to remove Oil Grease Paint or varnish Plastic
Slide 51:Heat Cleaning Ovens (Cont.)
Heat-cleaning oven does not require chemicals Superheated air is circulated over parts to burn off material Part temperature is raised just high enough to remove deposit without affecting metal
Slide 52:Heat Cleaning Ovens (Cont.)
Ovens eliminate disposal and liability problems associated with acid or chemical cleaning Modern ovens are designed to produce minimum emissions
Slide 53:WARNING
Before removing parts from oven, allow heat to dissipate. When removing parts from oven, wear leather gloves and shop apron.
Slide 54:Media Blasting
Media blasting can remove Paint Carbon Other dry deposits Blasting cleans parts and readies them for painting
Slide 55:Cleaning Threads
Use speed handle to run thread chaser through all bolt holes to clean threads
Slide 56:Air Blowgun
When finished cleaning parts, use air blowgun to blow off small bits of Dirt Solvent Water Other debris
Slide 57:Air Blowgun (Cont.)
Be sure to blow out Bolt holes Coolant passages Oil passages When finished with blowgun, there should be no dirt, debris, or deposits on engine or parts
Slide 58:WARNING
Use extreme care when using blowgun. Wear eye protection. Never aim gun at skin or other people. If air is forced into skin and blood stream, death may result.
Slide 59:Review Questions
The last several digits of a VIN identify the vehicle�s ____. model number manufacturer transmission type serial number Answer: D. serial number
Slide 60:Review Questions
True or False? Damage to cylinder walls is often repaired without removing the engine from the vehicle. Answer: False. Damage to cylinder walls is generally repaired with the engine out of the vehicle.
Slide 61:Review Questions
True or False? The rear main oil seal can be replaced without removing the engine if it is a two-piece seal and the oil pan can be removed easily. Answer: True
Slide 62:Review Questions
True or False? The engine removal process should be started by removing everything on top of the engine. Answer: False. The engine removal process should be started by removing everything under the vehicle.
Slide 63:Review Questions
While removing the engine, you should label ____ and ____ to help speed reassembly. Answer: fasteners, connectors
Slide 64:Review Questions
The lift brackets may already be built in or attached to the ____. transmission transaxle block manifolds Answer: C. block
Slide 65:Review Questions
True or False? Never disassemble a removed engine while it is on the hoist. Answer: True
Slide 66:Review Questions
True or False? In engine disassembly, cylinder head teardown is generally done before the front end is disassembled. Answer: False. The front end should be disassembled first.
Slide 67:Review Questions
A(n) ____ engine overhaul can be done only if cylinder and crankshaft wear are within specifications. Answer: in-vehicle
Slide 68:Review Questions
What metal should never be placed in a hot tank? Answer: Aluminum
Slide 69:Glossary
Air blowgun Used to blow off small bits of dirt, solvent, water, and other debris and to blow out bolt holes, coolant passages, and oil passages. Casting numbers Numbers formed into parts during manufacturing. They can be found on major components, such as the block, camshaft, and heads.
Slide 70:Glossary
Cold cleaning tank Tank used for removing oil and grease from parts. Also called a cold solvent tank. Crane boom Crane for lifting engine out of vehicle. Decarbonizing cleaner A very powerful chemical that can remove carbon, paint, gum, and most other deposits.
Slide 71:Glossary
Engine hoist Hoist for lifting engine out of vehicle. Engine overhaul A process that includes complete disassembly of the engine; cleaning, inspection, and measurement of critical parts; replacement or service of worn or damaged parts; and reassembly of the engine. Also termed engine rebuild.
Slide 72:Glossary
Engine rebuild A process that includes complete disassembly of the engine; cleaning, inspection, and measurement of critical parts; replacement or service of worn or damaged parts; and reassembly of the engine. Also termed engine overhaul. Engine stand A metal framework on small casters or wheels. It is used to hold an engine for disassembly and reassembly.
Slide 73:Glossary
Heat cleaning oven Oven designed to remove organic materials such as oil, grease, paint, varnish, and plastic from metal engine parts without the use of chemicals. Hot tank Tank that uses heat and a very powerful cleaning agent to clean engine parts. It is used to aggressively remove mineral deposits, hard carbon deposits, oil, grease, and paint.
Slide 74:Glossary
In-vehicle engine overhaul Overhaul that can only be done when cylinder and crankshaft wear are within specifications and the oil pan and heads can be easily removed with the engine installed in the vehicle. Lifting fixture A fixture or chain that attaches to lifting points on the engine for lifting the engine out of the vehicle.
Slide 75:Glossary
Media blasting Removes paint, carbon, and other dry deposits from parts. Mushrooming A condition in which valve tips have been hammered larger by the action of the rocker arms. Power brush Brush mounted in a drill and used to remove hard carbon deposits.
Slide 76:Glossary
Scuff pad Pad mounted in an air drill or similar tool that can cut through and lift off gasket material and silicone, yet is too soft to easily damage metal surfaces. Also called a scuff wheel. Spray-on gasket solvent Solvent used to soften a gasket so that it can be scraped off more easily. Teardown The basic disassembly of the engine.
Slide 77:Glossary
Thread chaser A tool for cleaning up damaged threads. Vehicle identification number (VIN) A unique number identifying the vehicle and some of the equipment installed on the vehicle. Wire wheel Used to remove carbon deposits, usually from valves. Available with various degrees of coarseness.