Download
1 / 5
50 likes | 52 Views
Experience top-notch services for commercial & residential needs with Asfar Majeed - Technical Services LLC. Reliable solutions guaranteed. Contact Us Now.

E N D
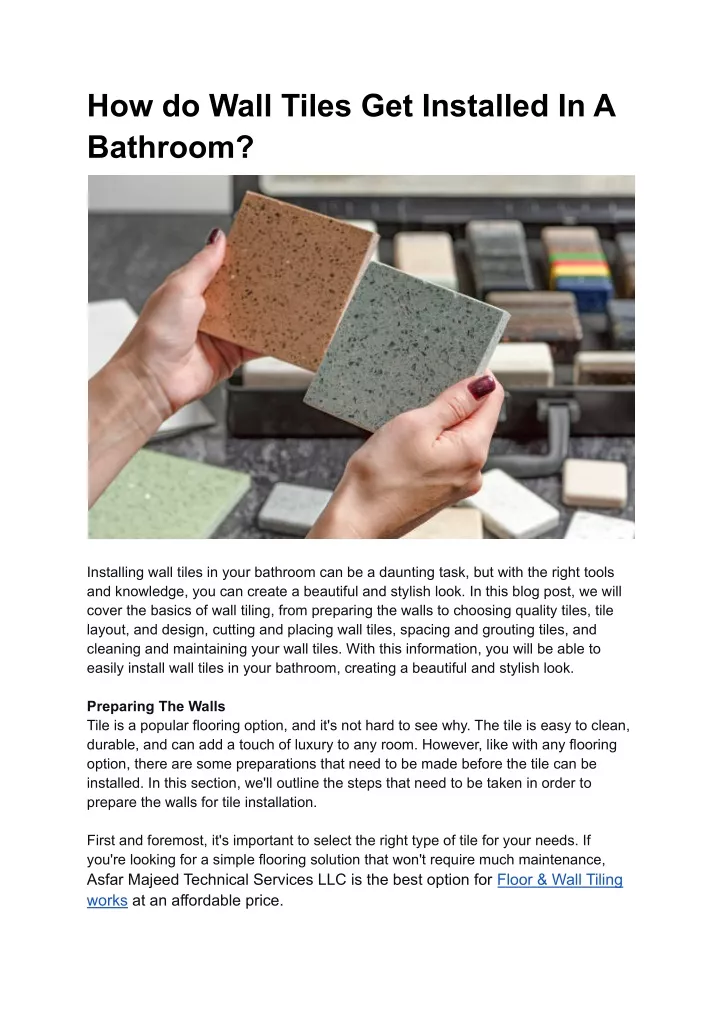
How do Wall Tiles Get Installed In A Bathroom? Installing wall tiles in your bathroom can be a daunting task, but with the right tools and knowledge, you can create a beautiful and stylish look. In this blog post, we will cover the basics of wall tiling, from preparing the walls to choosing quality tiles, tile layout, and design, cutting and placing wall tiles, spacing and grouting tiles, and cleaning and maintaining your wall tiles. With this information, you will be able to easily install wall tiles in your bathroom, creating a beautiful and stylish look. Preparing The Walls Tile is a popular flooring option, and it's not hard to see why. The tile is easy to clean, durable, and can add a touch of luxury to any room. However, like with any flooring option, there are some preparations that need to be made before the tile can be installed. In this section, we'll outline the steps that need to be taken in order to prepare the walls for tile installation. First and foremost, it's important to select the right type of tile for your needs. If you're looking for a simple flooring solution that won't require much maintenance, Asfar Majeed Technical Services LLC is the best option for Floor & Wall Tiling works at an affordable price.
Finally, keep in mind some safety precautions when tiling walls: always wear gloves when working with adhesives and make sure that you stay well-informed about any potential hazards associated with wall tiling before beginning work. And last but not least – make sure that your walls are completely clean before installing new tile! Choosing Quality Tiles When it comes to bathroom remodeling, choosing the right tiles is essential. Not only do you want to make sure that the tiles look great, but you also want to make sure that they're durable and will last for years. Here are a few factors to consider when choosing tiles for your project: Color: When selecting tiles for a bathroom, it's important to think about both the color and the material of the tile. Different colors will look great together, and some materials – like porcelain – are virtually stain-resistant. It's also important to choose a tile color that will go with your existing décor. Material: There are a variety of different materials that can be used for tiles in a bathroom, from ceramic to porcelain. It's important to choose the right material for your project – something that is both durable and easy to clean. Ceramic is a great choice for bathrooms because it's both strong and heat-resistant, making it perfect for areas where water exposure is common. Porcelain is another popular option because it's beautiful but also easy to clean. Installation: When installing tiles in a bathroom, it's important to take into account various factors like floor level and slope. You'll also need to measure and cut the tiles before installation so that they fit perfectly in place. Some helpful tools include a miter saw or jigsaw blade, as well as clamps or grip tape if necessary (to prevent slipping). There are many different types of grout available on the market today, so be sure to research which one will best suit your needs before making a purchase. Finally, always use quality sealers and adhesives when installing tile floors – this will help protect them from moisture damage over time. Now that you know what factors to consider when choosing tiles for your bathroom project, follow our step-by-step instructions below on how best to install them! Tile Layout & Design When it comes to bathroom tile, there are many options and design layouts to choose from. But with a little guidance, installing wall tiles is easy and can give your bathroom a fresh new look. In this section, we will walk you through the entire process of installing wall tiles, from measuring and choosing the right tile size to apply adhesive and laying the tiles down. Once your tiles are in place, it's time to add the finishing touches with grout and decorative accessories.
So whether you're looking for a simple update or something more dramatic, our step-by-step instructions on how to install wall tiles will guide you through every step of the process. And don't forget: when it comes to bathroom tile, there are endless design possibilities that won't be limited by square footage or style restrictions. So go ahead – experiment! Cutting & Placing Wall Tiles There's nothing quite as satisfying as coming home to a freshly painted or remodeled room. One of the main ways that you can achieve this look is by installing Wall Tiles. Wall tiles are easy to install and can be used in a variety of different settings, from the kitchen to the bathroom. In this section, we will outline the steps necessary for cutting and fitting wall tiles, as well as installing drywall or backing boards. We will also provide tips on how to apply adhesive to the back of the tiles, set each tile in place, and seal and finish the job with caulk and sealant. Before beginning, it is important to prepare your wall for tile installation. This means removing any old wallpaper or trimming off any excess paint or molding. Once your wall is clean and ready, begin cutting out your desired tiles using a straight edge and a jigsaw or sawzall. Make sure that you fit each tile precisely so that there are no gaps or irregularities on your surface. Once all of your tiles have been cut out, it is time to fit them into place using a tiled saw or jigsaw-style saws. Be sure to use caution when placing these types of saws – they are very sharp! Once all of the tiles have been fitted into place, it is time to install drywall (or equivalent) behind them so that they are fully supported. This step is usually done by an experienced contractor who knows how to handle these tools safely. After installing drywall (or backing board), it is time to apply adhesive (usually silicone) around each tile's perimeter so that they remain securely in place during installation procedures. Now comes the tricky part: setting each individual tile into its proper position on the wall surface using one of several techniques (such as finger placement). It's important not only to make sure that each tile fits snugly into its assigned spot but also to make sure that there are no gaps between adjacent tiles – otherwise, water vapor will seep through these spaces and cause damage over time (eek!). Finally, use black caulk along the seams between adjacent tiles so that they appear continuous once installed. For an extra-secure finish, apply additional caulk around any screw heads or other areas where moisture may collect over time (again – eek!). Once all of your tiles have been installed, it's time to clean up any excess grout from around screw heads with a putty knife before applying additional grout sealer around the entire surface with caulking. Spacing & Grouting Towels
Tiling is a popular DIY project that can be done in a variety of styles and colors. However, it's important to take the time to properly space and grout your tiles before you start installing them. By following the instructions below, you can create a professional finish that will look great for years to come. First, make sure that you have all of the tools that you'll need for tiling. You'll need a tile saw or wet tile cutter, adhesive, and measuring tape. Next, measure the dimensions of your wall surface and lay out the pattern on paper or cardboard. Once you have the pattern ready, apply the adhesive to your wall surface and position the tiles on top. Be sure to space them evenly so that there are no gaps between them. Now it's time to cut the tiles with your tile saw or wet tile cutter. Make sure to keep track of where each tile goes so that they're installed correctly and spaced evenly throughout your wall surface. Finally, finish off by applying any finishing touches, such as grouting (if desired) and painting or staining if desired. And remember – always clean up after yourself by removing any debris with a broom and mop! With proper spacing and grouting of tiles, tiling can be a quick and easy project that results in a professional-looking finish! Cleaning And Maintaining Your Wall Tiles If you're looking to update your bathroom with some new wall tiles, then you've come to the right place. We have all the tips and tricks that you need in order to get the job done quickly and easily. No matter what type of tile you choose, we'll teach you how to install it correctly and make sure that it lasts long term. First, let's take a look at some of the tools that you'll need for the installation process: a level, drill, trowel, tape measure, tile saw, and hammer. Next, we'll go over the steps for laying out the tiles on your wall – be sure to follow our precise instructions so that your tiles look perfect when they're finished. Once everything is laid out correctly, it's time to start cleaning up! Make sure to use a good cleaner on any spills or drips from the installation process. Once everything is clean and dry, apply a sealant if desired to protect the tiles from water damage. Finally – once every six months or so – reseal your wall tiles with our easy-to-use sealant! Enjoy your beautiful new wall tiles! Final Thoughts Installing wall tiles in your bathroom can be a great way to update and improve the look of your space. With the right tools, knowledge, and preparation, it is possible to create a stylish and luxurious look without breaking the bank. From selecting quality tiles that match your décor to preparing walls for installation, laying out the tile design, cutting and placing the wall tiles, spacing and grouting the tiles, and cleaning and maintaining them - there are many steps involved in this process. By following
our instructions above, you will be equipped with all of the information you need to successfully install wall tiles in your bathroom! Take the time to plan out your project carefully - with some patience and determination, and you can create a stunning space that will last for years to come.


![[ We are all OneMontclair ]](https://cdn1.slideserve.com/1565595/slide1-dt.jpg)